Before and After: Digital Media Accessioning Service

by Alice Prael

Before started in 2016 with a plan for centralizing born digital media accessioning.  There’s already a blog post about before, so I’ll skip ahead. “After” started in 2022 with a weird post-it map of born digital archiving workflows. Many thanks to my colleagues for bearing with those colorful semi-organized thoughts – at least there were fun illustrations! 

Blue, red, green, yellow and pink post-its with small writing and drawings related to born digital archives( e..g. "Born Digital on Media in Rare Books" with an image of a book open to a CD sleeve or "Email" with the letter icon and a computer screen open

A sample of the colorful post-its with illustrations from the Born Digital Archiving Mind Map

Some of these thoughts remained on a post-it, some were written into long term goals, and a few turned into work plans, projects, and documentation. One such post-it (okay, a few post-its) turned into a set of recommendations for the Digital Media Accessioning Service.  

In 2023 I worked with Mike Rush in Beinecke Operations and Richard Lynch in Library IT to develop SharePoint infrastructure to manage the service and track submissions of media.  The Born Digital Archives Working Group (now Advisory Group) and submitters to the Service provided feedback and recommendations. And now I’m working with my colleagues in Digital Preservation Services to identify areas of collaboration and capacity building for the service. 

A lot has changed, so here’s the before-and-after overview for the Digital Media Accessioning Service 

  • Before (2016): A Digital Accessioning Support Service for backlogs of digital media. 
  • After (2024): A Digital Media Accessioning Service that includes submitters to the service as collaborators and addresses bottlenecks to increase our overall capacity.
  • Before: By default, the service creates a disk image for all submitted media.  Submitters can request file transfers. 
  • After: By default, the service does a logical file transfer for most submitted media, exceptions for disk imaging floppy disks (due to Kryoflux capture process) and Macintosh computers manufactured prior to 2000 (due to known complications with the file system).  Submitters may still request a disk image.   
    • Impact: Logical file transfers do not include system files or deleted files (which we cannot provide access to and do not intend to preserve but cannot be excluded from a disk image capture), resulting in less digital storage for files that should not be acquired. 
    • Impact: Logical file transfers can more easily be characterized and managed in Preservica. 
    • Impact: In some unique cases, logical file transfers might break software dependencies required for long-term access via emulation. The Software Preservation and Emulation team works closely with Digital Preservation Services to connect with staff who might benefit from requesting disk imaging.
  • Before: Media label must be transcribed to the Title field in the metadata spreadsheet. 
  • After: If Title field is left blank the service will transcribe the media label.  If staff are reviewing media prior to Aspace/Preservica ingest, they will have the opportunity to review and change Titles.
    • Impact: lower barrier to submission, additional service labor 
  • Before: Required each piece of tangible media to be labeled with the Component Unique ID (CUID) 
  • After: The service will label media with the CUID 
    • Considerations: the service confirms the number of media in a box and labels each piece of media with CUID that matches the media type.  If the service is transcribing titles and labeling media with CUIDs, the submitter cannot control the order of CUIDs within a box.  If this is important to the submitter, they must either transcribe media labels to the Title field in the spreadsheet or label each piece of media with the CUID. 
    • Impact: Lower barrier to submission, additional service labor
  • Before: All media is photographed and scanned for Personally Identifiable Information (PII) unless requested otherwise.  
  • After: Photographing media and scanning for PII is now a choice in the submission survey.  This decision is applied to all media in that submission. 
    • Considerations: How will the PII scan and photograph be used?  Will the collection receive further processing, including more collection-specific searching?
    • Considerations: Can the file formats present be scanned for PII?  For example, PII scans will not identify personal information in audio files.
    • Impact: Service saves time and digital storage by not creating unnecessary files.
  • Before: Required the ArchivesSpace URL in submitted metadata spreadsheet (either parent archival object URL for the service to create child item records OR existing archival object to update) 
  • After: ArchivesSpace URL is not required until the spreadsheet is ready for Aspace import.  If submitter does not plan to review data before import, then Aspace URLs are required in the submitted spreadsheet. 
    • Impact: Staff can review files before deciding on descriptive structure, resulting in more integrated description of born digital materials.
  • Before: Submitter uses online survey to send the spreadsheet, then a working copy is saved in network storage until the data is imported to Aspace. 
  • After: Spreadsheet is submitted via SharePoint survey and is immediately stored in a Document Library, where it is available to both the BDS staff and the submitter.  Submitters can also add other library staff as “watchers”, which provides edit access to the spreadsheet.
    • Impact: Increased transparency and collaboration as data can be shared and updated collectively.  Also removes confusion of multiple copies held by each department. The spreadsheet in the SharePoint Document Library is the working copy until the service exports data as CSV and imports to ArchivesSpace.   
  • Before: Submitter does not have access to files until after ArchivesSpace description is updated and files are ingested to Preservica – unless special arrangements were requested in the submission survey or via email. 
  • After: When the submitter is notified that the submission is ready for their review, they can either 1) respond to the notification email and request download access to the entire submission or a specific set of CUIDs to be delivered via OneDrive or 2) Schedule a lab appointment to review materials on a machine in C131.
    • Consideration: This workflow assumes that material is usually deaccessioned at the media level.  If file-level appraisal becomes more common, we will need to automate this process. 
    • Impact: More opportunity for appraisal of born digital material before ingest to Preservica. 
  • Before: Submissions were tracked in a Box spreadsheet, where I manually created a new row for each box submitted to the service, including CollectionName_BoxNumber, SpreadsheetName, number of media and the date of submission.  I updated this Box Tracking Spreadsheet with dates for: files capture, media photographed, scanned for PII, spreadsheet imported to Aspace, files packaged for Preservica ingest, and Preservica ingest complete.  
  • After: Each submitted spreadsheet in the SharePoint Document Library has a Status that can be updated by any staff with access to that submission.  When a status is updated, SharePoint triggers a notification email to the submitter and DPS. 
    • Impact: The Box Tracking Spreadsheet provided an easy way to calculate the number of media and track how quickly materials were accessioned by the service.  The new model relies on Preservica and ArchivesSpace for this type of reporting.  
    • Impact: Submitter receives automatic notifications when a major workflow step is complete (received, in progress, ready for submitter review, ready for ArchivesSpace import, ready for Preservica packaging and ingest). Improved transparency and communication. 
  • Before *as of 2018: My position, Digital Archivist for Yale Special Collection, was in the Manuscript Unit, Beinecke Library Technical Services.  I spent 90% of my time on born digital materials in Beinecke Library, 10% on digital media accessioning for other repositories. 
  • After: As of September 2023, my position is Born Digital Specialist in Digital Preservation Services.  We are still identifying capacity limits and determining the best way for my position as Born Digital Specialist to support Yale Libraries.   
    • Impact: Digital Preservation Services is oriented towards staff training and system maintenance, which aligns with the Born Digital Specialist’s role.  
    • Impact: Better coverage for born digital support.  When the Born Digital Specialist is unavailable, staff can request support from digitalpreservation@yale.edu.   
    • Impact: Lauren Work serves as DPS Liaison for Media Accessioning Service, packaging and ingesting to Preservica for backlog and new acquisitions. 


Bonus Round: No Before, Just After 

These are new processes that the service can support but are not part of the standard workflow.

  • Instead of 1 row = 1 piece of media, do you want 1 row = 1 folder or 1 file?  We can use the Notes column in the spreadsheet to document the path to file or folder. 
    • Consideration: This is possible right now but may require development to become a standard workflow option.   
    • Deep-ish dive, feel free to skip: I’m using Excel concatenate function to create Teracopy command line scripts, using the file/folder list from the Notes column.  The Teracopy command line doesn’t include reporting function, so a log file is only created if an error or failed transfer occurs.  So far, the requests have been simple enough to manually separate the File Manifest (created by running Siegfried over the files on original media).  For more complex separation, I could run Siegfried on the post-transfer files in the Content folders instead. 


  • If staff need access to born digital content that can’t be accurately rendered using standard tools for legacy files (e.g. FTK Imager, FTK, QuickViewPlus) – Digital Preservation Services has support from the Software Preservation and Emulation team to emulate the computing environment needed to view the content.  The Emulation-as-a-Service Infrastructure (EaaSI) system can be used to provide staff with access to born digital files in an emulated computing environment with software dependencies installed.   
    • Consideration: Requesting emulation will often require additional research and trial-and-error testing to identify the correct combination of OS and software to support the content. 
    • Consideration: Although the EaaSI system is user-friendly, the original software presented in emulation may not be.  For example, if you request access to database files created in MS-DOS, plan for a learning curve to working with MS-DOS database software. 

Introducing the YUL Emulation Viewer

by Seth Anderson

Happy World Digital Preservation Day! As you might expect, we here in YUL’s Digital Preservation Services (DPS) department are big fans of WDPD since it gives us a chance to toot our own horn. There are many exciting projects and pursuits in DPS to tout, but today I want to highlight an exciting new service that has been years in the making.

As the Software Preservation Program Manager at YUL, I spend my days managing the Emulation-as-a-Service Infrastructure (EaaSI) program, which keeps me plenty busy as we continue to develop on-demand emulation services (emulation = recreation of older computer systems and software in modern infrastructure). My other primary responsibility is the implementation of library services using the emulation technology developed by the EaaSI program. Since there’s little precedent for emulation services this is always an exciting prospect; we get to plot our own course and innovate new opportunities for access to YUL’s collection of digital materials.

Our first emulation service, the YUL Emulation Viewer, is set for release early next year when students return for the Spring 2021 semester. The Emulation Viewer provides immediate access to CD-ROM titles in the library’s circulating collection. In the 90s and 00s, many libraries acquired CD-ROMs, whether as stand alone items or as supplements to books. These discs are still available to check-out, but how many computers still come with a CD drive? How well would a title designed for Windows 98 operate on your Windows 10 laptop? For all intents and purposes, these CDs are an obsolete technology. And yet, they contain a wide variety of valuable research resources; anything from a guide to optimizing soil moisture to survey results tracking family growth from 1988-1990, and much more.

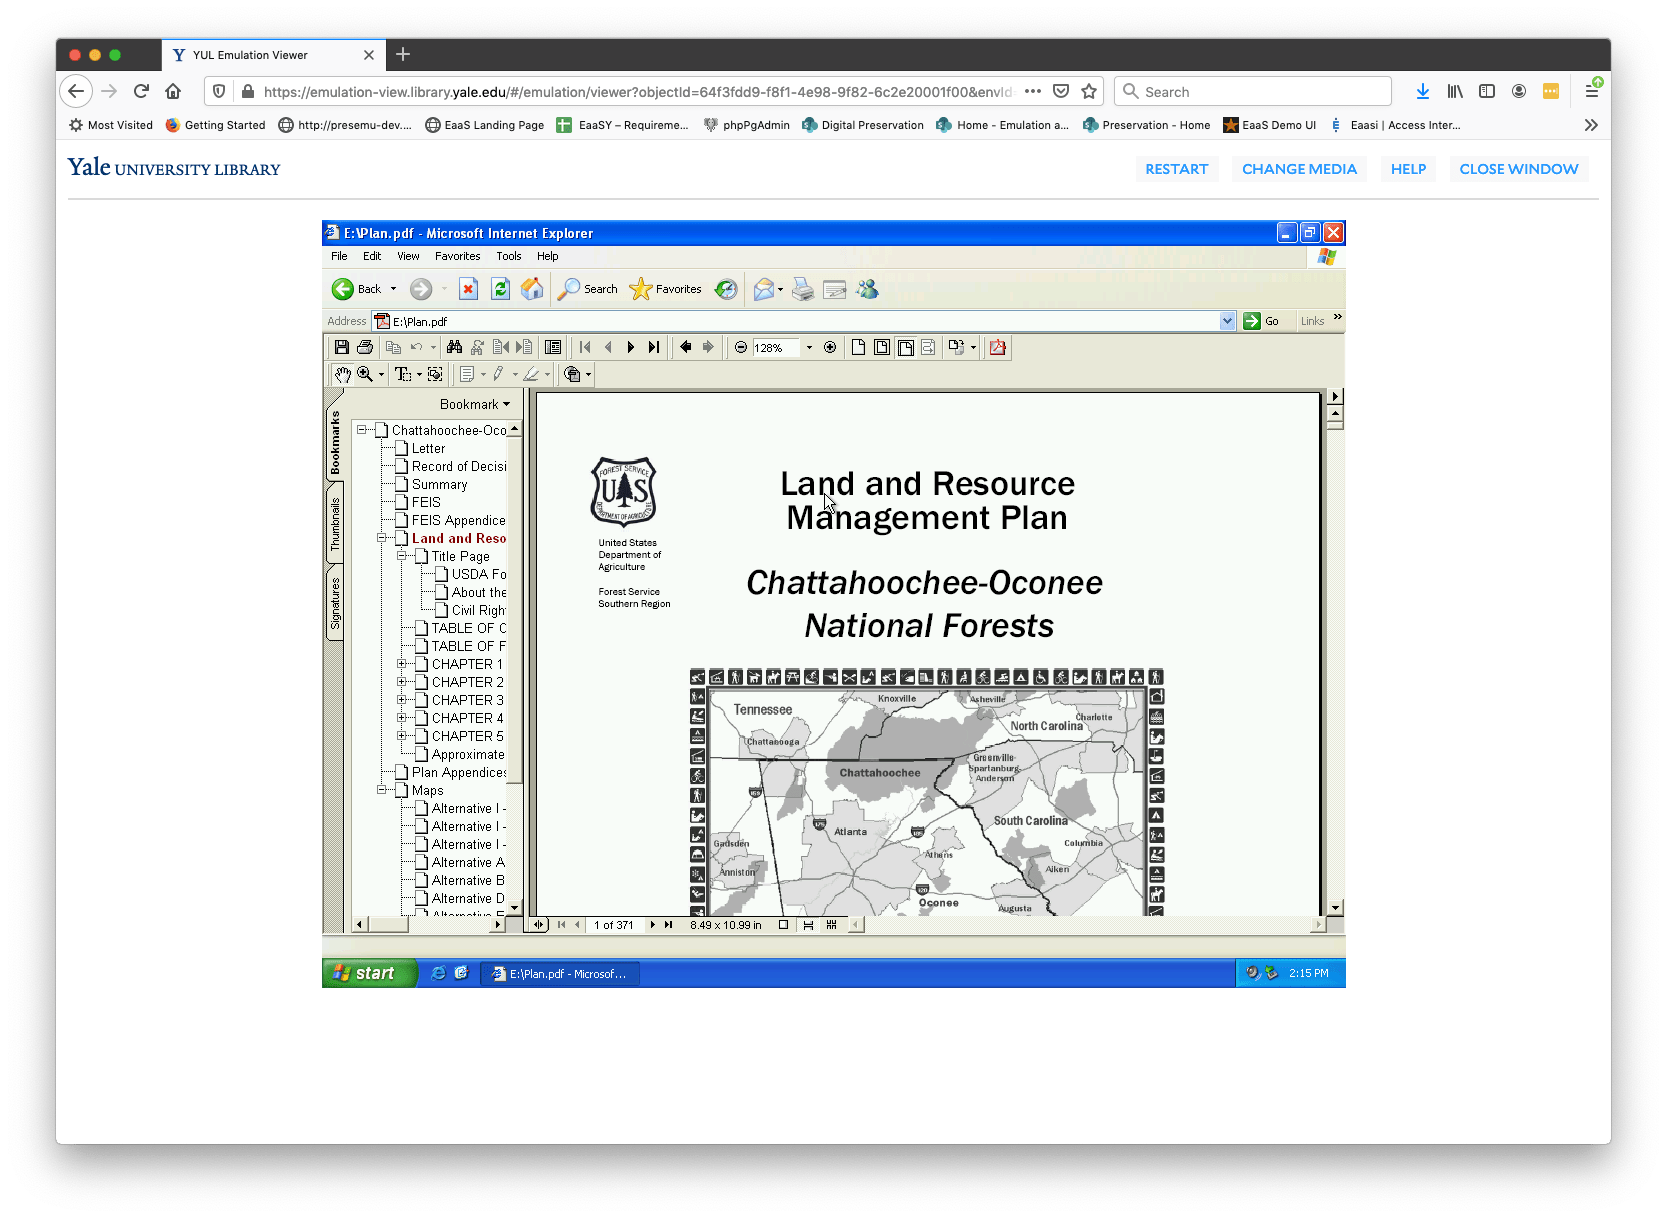
The YUL Emulation Viewer will work much like an eBook you might access from the library catalog. Clicking a link in the item’s record will take you to the simple viewer interface. Access to these materials is limited to Yale-affiliated users, so you’ll have to login with your netID and password. In the interface, you’ll see a few simple controls and the computer within the computer as the emulation starts up. These emulations are set up to run the CD-ROM upon start up, so you won’t have to navigate much or at all to access the disc. Scroll your mouse over the emulation window and you’re in control! 

Image of EaaSI interface showing National Forests, Chattahoochee-Oconee, Appendices Land and Resource Management Plan

National Forests, Chattahoochee-Oconee, Appendices Land and Resource Management Plan, January 2004 in Windows XP

We’re making a couple hundred CD-ROMs available to start, but there are thousands still to set up. This process started a few years ago when DPS undertook a monumental effort to create digital copies of all of the CD-ROMs in the library’s circulating collection. Since then, our excellent team of student workers has worked their way through these digital copies, identifying the appropriate computer environment and configuring the disc in the emulation. This often requires some sleuthing, as the students must determine how to access the contents of the disc: Is it run directly off the disc? Does it require a specific software application to open? What are users supposed to open first? Thankfully, the students have capably done this investigatory work so future users don’t have to.

Unfortunately, setting up these discs is often hindered by one major roadblock: software. For instance, many discs simply contain PDF files, which require a contemporaneous version of Adobe Acrobat, Adobe Reader, or another compatible application to properly render. This issue may go even deeper than one piece of software and a CD may require a specific operating system to function. If we don’t have this software, it’s challenging to ensure we are providing an accurate representation of the disc. As part of the EaaSI program, DPS has acquired many software titles to use for this service and others and we plan to continue configuring discs until we’ve made all or most of them available.

DPS is committed to increasing access to digital collections using emulation. Over the next 1.5 years of the EaaSI program, we plan to expand the emulation services at YUL and Yale to provide access to special collections materials, scientific research, and more.

Special thanks to the Andrew W. Mellon and the Alfred P. Sloan foundations for their generous sponsorship of the YUL Emulation Viewer and EaaSI program.

Email Task Force Report

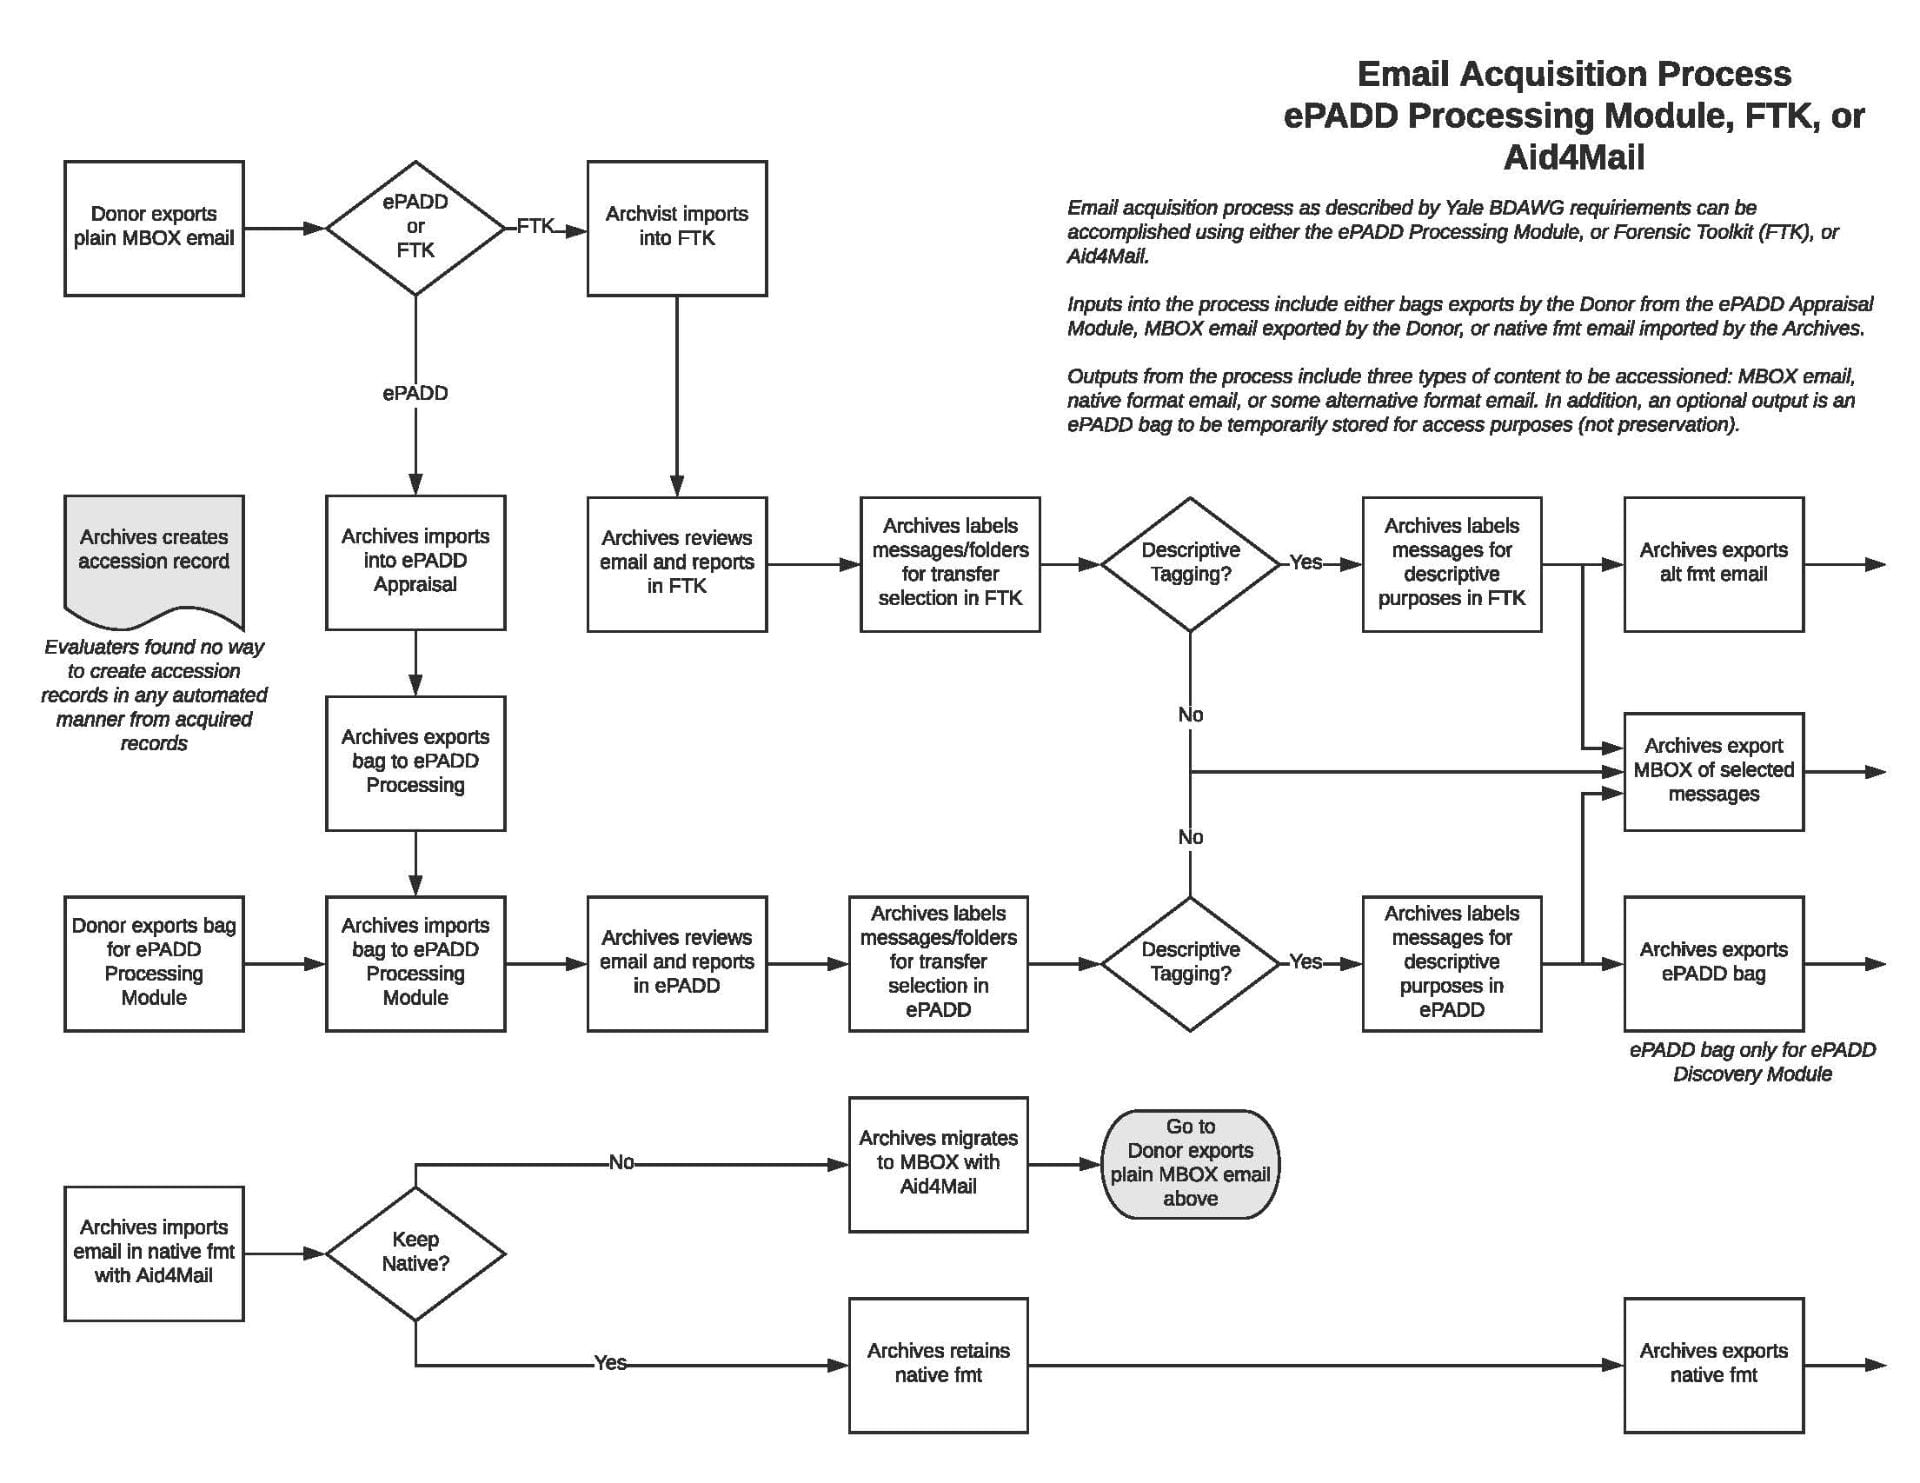
In early FY19 an Email Archiving task force was convened by the Born Digital Archives Working Group (BDAWG) to explore the topic of email archiving at Yale.  The task force included archivists and librarians from throughout the Yale University Libraries and Museums (YUL/M) and produced the Born Digital Archives Working Group (BDAWG)Email Archiving Task Force: Final Report.  This product aims to provide an analysis of current tools and workflows around email archiving practices from throughout the field, identify requirements, and explore workflow and tool combinations for use by units at Yale.  Of specific interest has been determining which, from the current landscape of existing tools and approaches, could be adopted by units within YUL/M to readily integrate with existing tools and services.

With a focus on the areas of pre-acquisition, acquisitions, accessioning, and preservation, the task force began the process of gathering information about current tools and processes via an environmental scan.  The scan included interviews with those currently involved with email archiving, both from within and outside of the institution. The gathered information highlighted a diverse set of tools with a subset, of the most commonly used, emerging from across the responses.  The need for well-documented and iterative testing of such tools was also expressed.

The elicitation of core requirements began with the creation of user stories, outlining the actions of key personas in each area of focus.  Through discussion around these predicted tasks and summary of user interactions, the group identified 30 in-scope core requirements across the categories of pre-acquisition, acquisitions, accessioning, preservation, and general requirements.  With the requirements in hand, we turned to the formation of actionable workflows to satisfy each.

Parallel to the requirements elicitation process, and building on the product of the environmental scan,  a summary examination of tools suited for performing various aspects of email archiving was compiled. With a base knowledge of the existing tools and their functionality, each was assessed against the group’s core requirements with the goal of identifying tools that would allow for the full set of requirements to be satisfied, and be subject to in-depth testing.

A small working group was charged with further evaluating the ePADD, Forensic Toolkit (FTK), and Aid4Mail applications.  These tools were identified for testing based on the workflows observed via the environmental scan as being well-suited to handle the flow of data through each stage of the process.  Following additional testing the group formulated process workflow diagrams, modeling how a staff member might undertake the processes of pre-acquisition, acquisitions, accessioning, and preservation in a manner that adheres to the core requirements.

To best facilitate the testing of identified tools and processes, the task force will continue to meet to discuss real-world examples from within the institution’s collections.  Towards providing a consistent and accessible set of tools, work on the creation of a centrally supported suite of software for staff working on born-digital collections has commenced with task force members and LibraryIT.  The full details of our processes and findings are available in the full report.


Emulating Amnesia

By Alice Prael and Ethan Gates

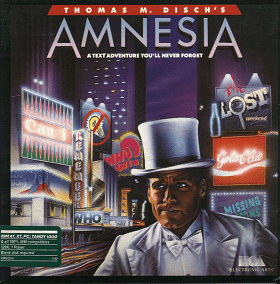
In 1986 the science fiction author, Thomas M. Disch published the text based video game titled “Amnesia.”  The game begins when the player’s character awakens in a hotel room in midtown Manhattan with no memory. The character must reveal his own life story in order to escape an attacker and prove he never killed anyone in Texas.  The game was produced for IBM PC, Apple II and Commodore 64.

Cover of the original Amensia video game. Man in white tuxedo with confused expression stands in front of bright city background of billboards and shops.In 1991 the Beinecke Rare Book and Manuscript Library acquired the papers of Thomas M. Disch; including his writings, correspondence, and ten 5.25-inch floppy disks, containing multiple versions of the video game titled “Amnesia”.

In 2019 the Digital Archivist for Yale Special Collections, that’s me, Alice Prael, was searching for born digital archival material to test emulating legacy operating systems – like IBM PC, Apple II and Commodore 64. Funnily enough, the collection of born digital material I immediately remembered was titled “Amnesia”.  

This fascinating game preserves a moment in video game development from the mid 1980s and presents an accurate reflection of 1986 midtown Manhattan, complete with shop names and correct opening and closing times.  The production of the game for three different operating systems, makes it a great example for testing emulation capabilities. Fortunately, the content from these floppy disks had already been captured by the Digital Accessioning Support Service (DASS) in 2016. Unfortunately, the initial content capture was not entirely successful. The DASS captured the Kryoflux stream files and when disk imaging failed twice the DASS moved onto the next disk.  

Quick Jargon Check:  A disk image is a file that contains the contents and structure of a disk, it’s an exact copy of the disk without the physical carrier. When disk imaging is successful, the image can be mounted on your computer and opened like an attached flash drive to view the file system and contents.

Kryoflux stream files capture the magnetic flux on a floppy disk – which can then be interpreted into one of the 29 disk image formats.  The stream files cannot be mounted and viewed like a file system, they can only be interpreted through the Kryoflux software. However, once Kryoflux interprets the stream files into the correct image format, that disk image can then be mounted to view the files.  Now back to our story.

Since the stream files serve as a preservation copy, the DASS only tries two disk image formats before moving on.  In order to use Amnesia as a test case, the stream files had to be re-interpreted into the one correct disk image format out of the 29 formats supported by Kryoflux – but which one?  I started with the Commodore 64 version of the game. 14 Kryoflux disk image formats begin with CBM (Commodore Business Machines) so I started there. After some initial research to learn the history of image formats like “CMB V-MAX!” and “CBM Vorpal” I decided it would be much faster to try them all and see which ones worked.  I created 14 disk images and attempted to mount each one to view the contents. 13 of them were mountable disk images. The game’s reliance on legacy operating systems makes it an ideal case for access via emulation, but that also means that the content isn’t readable like a normal file system full of text files. When I loaded the disk images I couldn’t make out full sentences, but a few of the mounted disk images revealed fully formed words like “hat”,“hamburger”, and “umbrella” – already proving more successful than the initial disk imaging in 2016. 

From here I handed the disk images off to the Software Preservation Analyst, Ethan Gates, so I’ll let him tell the rest of the story.


Since I was largely unfamiliar with Commodore computing before this test case, I was slightly intimidated by the number of even partially-mountable images to test. But I had the same realization as Alice – rather than diving straight into the deep end of trying to understand each image format, it was faster to just try to plug each image into an emulator and see if the program could narrow the field for us. (Emulators are applications that mimic the hardware and software of another computer system – they can let you run Windows 95 on a Mac, or an Atari on your Intel PC, or much much more)

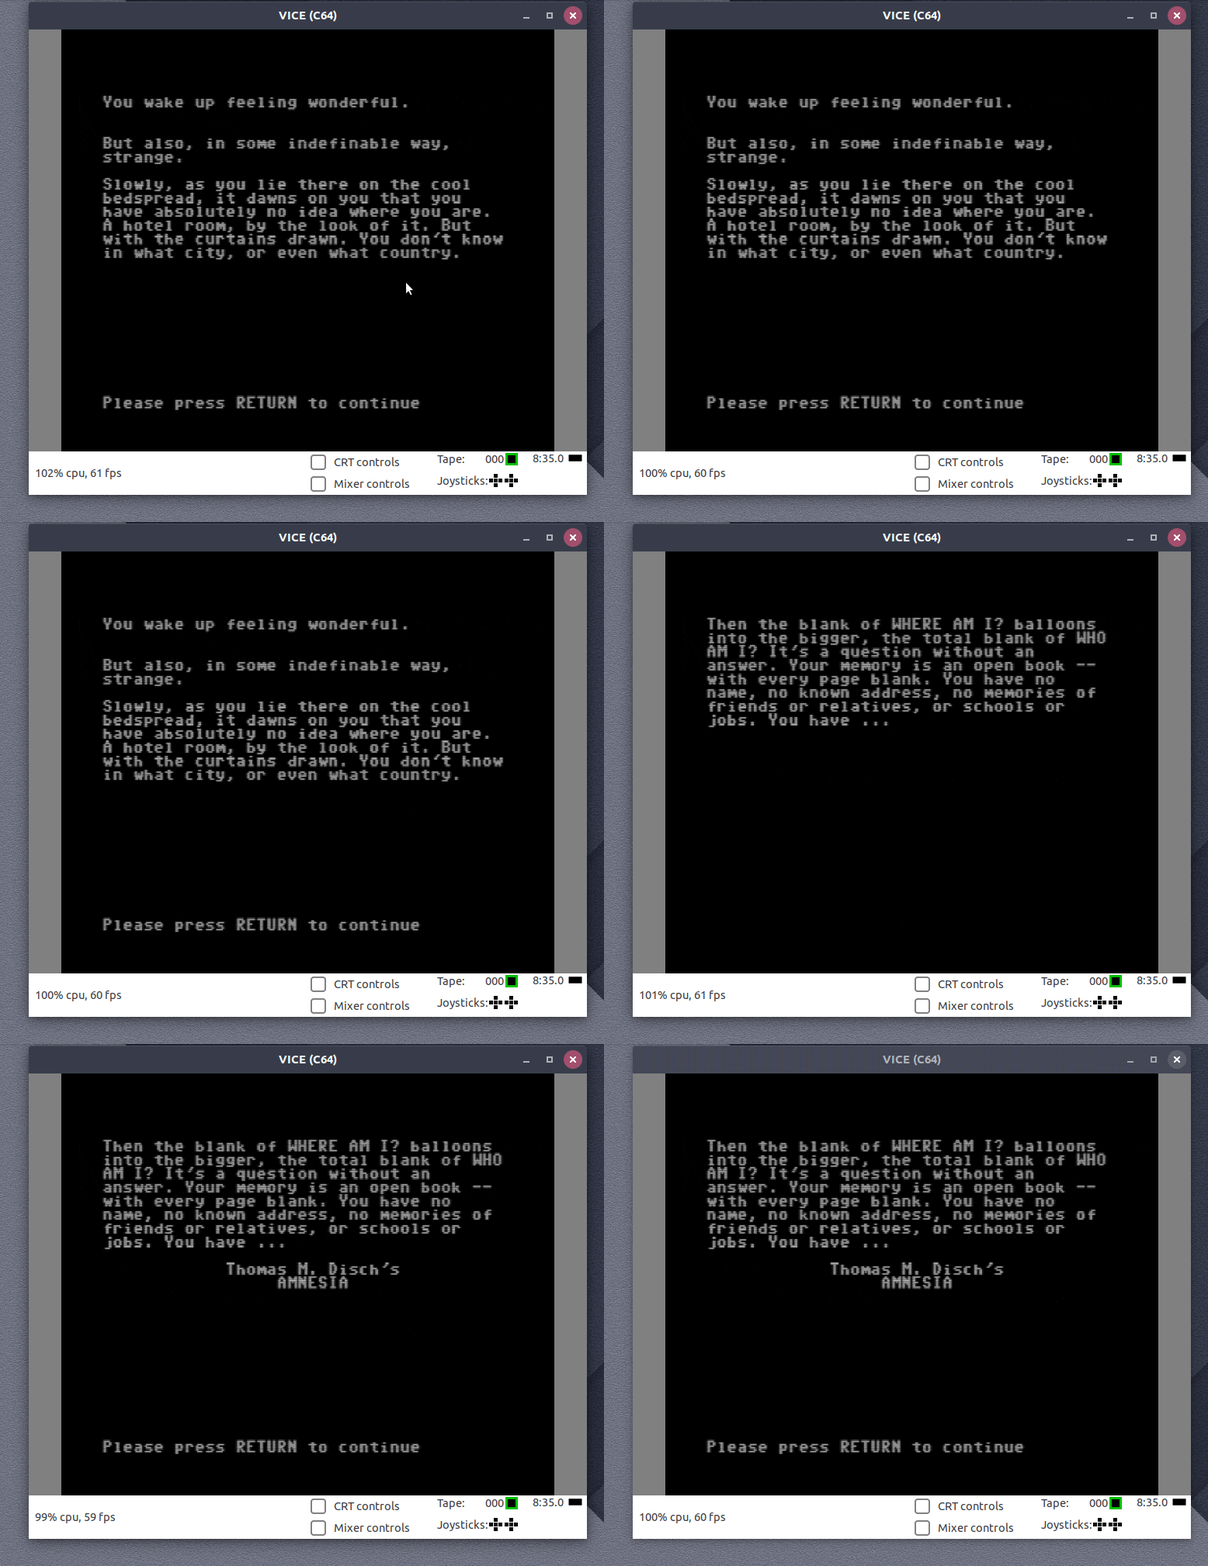
So, in a testing session with Claire Fox (a student in NYU’s Moving Image Archiving and Preservation M.A. program and our summer intern in Digital Preservation Services), we fired up VICE, an open source Commodore 64 emulator that we also use for the EaaSI project. When “attaching” a disk image (simulating the experience of inserting a floppy disk into an actual Commodore computer), VICE automatically gives a sense of whether the emulator can read the contents of that image:Screenshot of emulator

Out of all the disk images Alice provided, VICE only seemed able to see the “Amnesia” program on 3 of them (“Amnesia” was distributed by Electronic Arts, hence the labeling). One (“CBM DOS”) simply froze on an image of the EA logo when attached and run. Two others –  both flavors of “CBM GCR” – successfully booted into the game.

Screenshot of the Amnesia game introduction pageWe proceeded a ways into the game (until getting stumped by the first puzzle, at least) in order to be confident that the content and commands were working, and to compare whether the two images seemed to behave the same way. They did, which meant it was time to finally do some proper research and figure out the difference between these two formats that Kryoflux offered, and which one we should move forward with using for emulation.

Per the Kryoflux and VICE manuals, we learned that “CBM GCR” (or “G64”) disk image format was originally designed specifically for use with Commodore emulators by the teams behind VICE and CCS64 (another popular application). It is a flexible, “polymorphic” format whose main benefit is that it can help foil a number of copy protection methods – tricks that publishers like EA used to prevent users from copying their commercial floppies over to blank disks – the 1980s version of digital right management (DRM), essentially. The second CBM GCR option is the same format “plus mastering data needed for rewriting” – near as I can tell, this is only necessary for writing the disk image back out to a “new” 5.25-inch floppy, which I doubt will be in Yale’s use case. We’ll proceed with our first CBM GCR disk images for offering access to the Commodore 64 version of “Amnesia”.

This is very exciting progress, and we have been able to run “Amnesia” in a web browser using VICE in the Emulation-as-a-Service platform as well. Part of the fun moving forward will be deciding exactly what it should look like when presented to Beinecke patrons: VICE can actually recreate not just the Commodore 64, but a large range of other 8-bit Commodore models, as well as a number of aesthetic tweaks recreating a CRT display (brightness, contrast, scan lines, etc.) all of which can slightly alter the game’s appearance (OK, the difference is very slight with a text-based game, but still). VICE’s default options clearly do the heavy lifting to bring Disch’s work to life, but how important are these choices for design and context?

A further challenge will be working with the versions of “Amnesia” for systems beyond the Commodore. Kryoflux’s available formats for IBM PC and Apple II disk images do not handle EA’s copy protection schemes as well as their Commodore options, and so far we have not been able to create a usable disk image for either. It would be fascinating to be able to jump back and forth between multiple versions of the game in emulation to see how the text may have subtly changed, but that will require more investigation into properly converting emulatable copies from the preservation stream files.

Developing Shared Born Digital Archival Description Guidelines at the Yale University Library

by Matthew Gorham

Since at least the early-to-mid 2000s, many archivists at Yale special collections repositories have been describing born digital materials in their archival collections, whether that entailed accounting for the disks, hard drives, and other digital media found in boxes alongside paper records, or describing the contents stored on those carriers. However, our descriptive practices for born digital materials have not always been performed consistently, nor have they been standardized or clearly defined across our repositories. Early in its deliberations, the Born Digital Archives Working Group (BDAWG) identified the need for shared guidelines regarding the arrangement and description of born-digital material in accordance with national standards and evolving best practices, and in early 2018 it made a request to the Archival and Manuscript Description Committee (AMDECO) to develop and document these guidelines. 

To accomplish this goal, AMDECO appointed a task force comprised of Alison Clemens (Manuscripts and Archives), Matthew Gorham (Beinecke Library), Jonathan Manton (Gilmore Music Library), CatePeebles (Yale Center for British Art), and Jessica Quagliaroli (Manuscripts and Archives). The Born Digital Archival Description Task Force began its work in September 2018, and after over a year of work, we are very close to releasing the first iteration of Yale University Library’s Born Digital Description Guidelines for use by special collections staff. The process by which we carried out this project is yet another great example of the power of collaboration and resource sharing (not only at Yale, but also in the larger archival profession) to address the challenges of collecting, preserving, and making born digital materials accessible to researchers.

The task force’s primary goal was to develop consistent, extensible, DACS-based guidelines for describing born digital materials. Within this framework, we wanted to define which DACS descriptive elements are required, recommended, or optional for describing born digital materials at different levels of description; highlight the key differences between born digital and analog description through the application of these elements; and provide general guidance on appropriate arrangement and description levels for born digital materials. We also didn’t want to reinvent the wheel, and because we knew that many of our peer institutions had already done considerable work on these issues, one of our first steps was to conduct an environmental scan of best practices for describing born digital materials in the wider archival profession. We reached out to 15 repositories to inquire about their own practices for describing born digital materials and received responses from most of them. It turned out that many of our peers were in the midst of similar efforts, or were planning to undertake them in the near future, while those who had already developed their own born digital descriptive guidelines were generous in sharing their documentation with us, and in some cases, detailing their own processes for creating them. 

Following this outreach effort, we spent several weeks reviewing, analyzing, and discussing the best practices documents that colleagues had shared with us (in particular, UC Guidelines for Born-Digital Archival Description, the University at Buffalo Processing and Description: Digital Material Guidelines, and Northwestern University Library’s Born-Digital Archival Description Guidelines for Distinctive Collections), and used the information we gathered from this review to begin developing our own set of guidelines. We then spent several months going step-by-step through the DACS descriptive elements, discussing how each one would apply to born digital materials; whether its application to born digital would be different than it would be when describing analog materials; how each element would or should be used at different levels of description; and which elements would be deemed required, recommended, or optional at different levels of description. 

Out of all this, we came away with a basic framework for the guidelines, which we then put to the test in a series of iterative steps. In the spring, the task force tested the guidelines by using them to describe born digital materials in a hybrid collection from the Beinecke Library. Over the summer, we sent a first draft of the guidelines to BDAWG and AMDECO for review and feedback, and then to a group of managers and leaders at Yale special collections repositories. Finally, just this past week, we held a workshop on born digital archival description practices for Yale special collections staff, taught by UCLA Digital Archivist (and co-author of UC’s born digital description guidelines) Shira Peltzman. The workshop was a variation on one that Shira had taught a few times before using UC’s born digital description guidelines, but in this case, she tailored it to our staff by using Yale’s draft guidelines to guide the attendees through a series of hands-on born digital description activities.

From each of these audiences, the task force gained unique and helpful insights into how the guidelines could be clarified or otherwise improved, and how easy or challenging they would be for archivists to implement in their work. Over the next few weeks, the task force will make some final revisions to the initial draft of the guidelines based on the feedback we’ve received, and then roll them out to the wider Yale University Library and share them publicly. If you’re interested in seeing the results of the task force’s work, stay tuned for an update to this post with a link to the published guidelines in the near future.

Update: The published guidelines are now available here! https://guides.library.yale.edu/bddescriptionguidelines

Data by the Foot

by David Cirella

Tapes, Tapes, Tapes

There are no shortage of different manners in which digital objects find their way into our collections. From the various types of network-based transfers to CD-Rs and/or floppy disks tucked into boxes of paper records, working out the processes around transferring data from one place to another is an everyday task. While the most common methods of transfer have tried-and-true solutions, legacy media formats, such as data tapes, present a need for new and custom solutions (and often some detective work).

Tape?!

As a medium, tape (magnetic tape) is something that nearly everyone has had some exposure to. From the ardent mix-tape makers of yesteryear to those more recent devotees to the format, tape is, or has been, a common item in many industries and households alike.

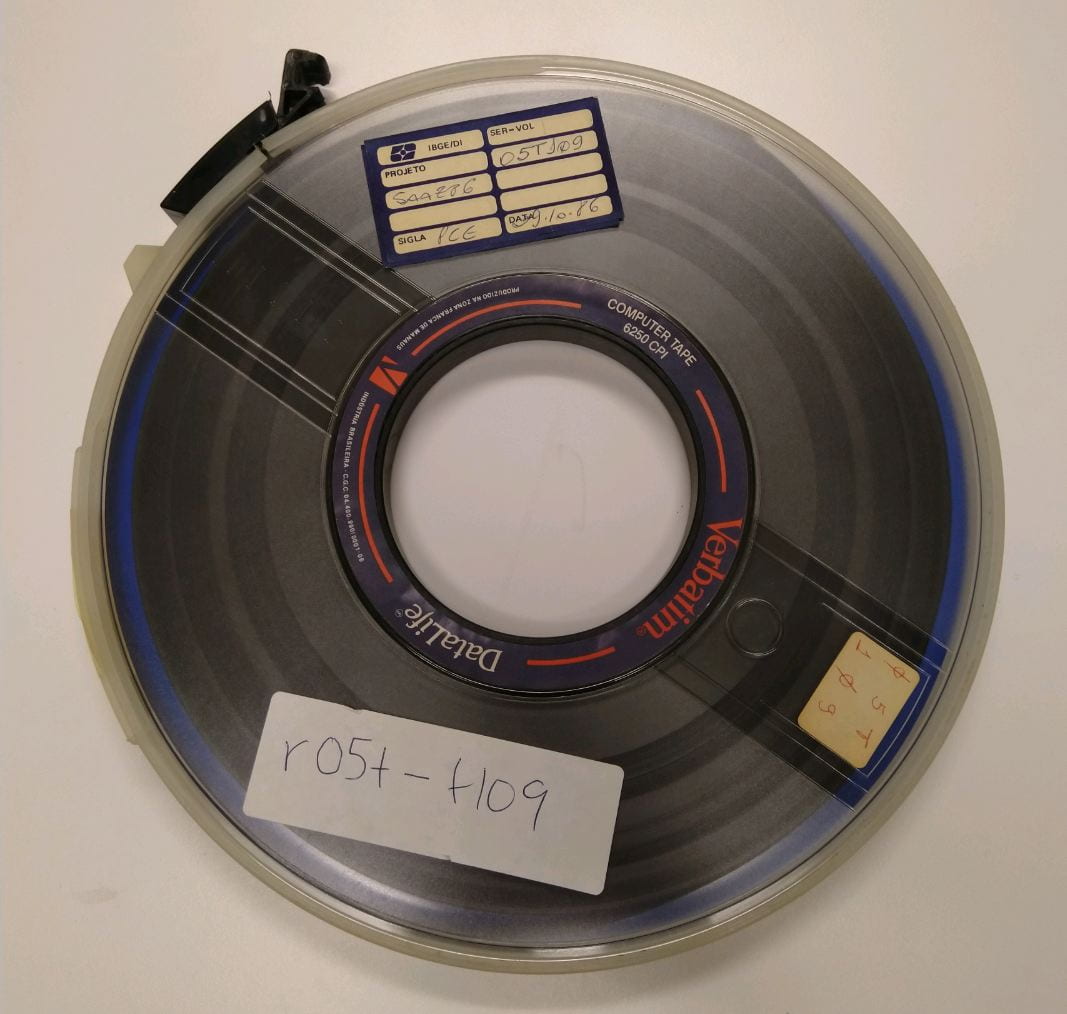
In addition to audio and video applications, magnetic tape has been widely used for data storage, with a multitude of different formats coming in and out of common use in enterprise and academic computing areas since the 1950’s. While the set of data tape formats is a diverse group, enterprise-grade tape-based storage generally provides a robust mechanical and error-resistant storage option. Other attractive qualities of tape storage include: the increased stability that comes with an off-line (or near-line) format that protects data-at-rest from any unintentional changes (accidental deletion, modifications, virus/malware), lower cost relative to hard drives of the same capacity, and longevity of up to 30 years

9 Track tape

9 Track Tape


Risks

Despite these positive qualities, as with any physical media, tape is susceptible to degradation over time. Environmental factors, such as relative humidity, can affect the robustness of data. Temperature and tension also have an effect on the health of tape (and data stored on it).

Many of the risk factors affecting tape are difficult to assess for the media we receive that are targeted for preservation. Specifically, the environmental factors that most affect tape can be very difficult to ascertain on tapes that have not been held in library storage facilities.

Recovery Workflow

Given the wide time-frame during which data tape formats were in use, coupled with the prevalence of risk factors affecting media of that age, data tapes have become a regular target for the recovery of digital content. Over the past year in the the Digital Preservation Unit, I have worked on the recovery of data from tapes written during the 1970’s to early 2000’s, in various formats including: SDLT, Data8, QIC-80, and 9 Track tape.

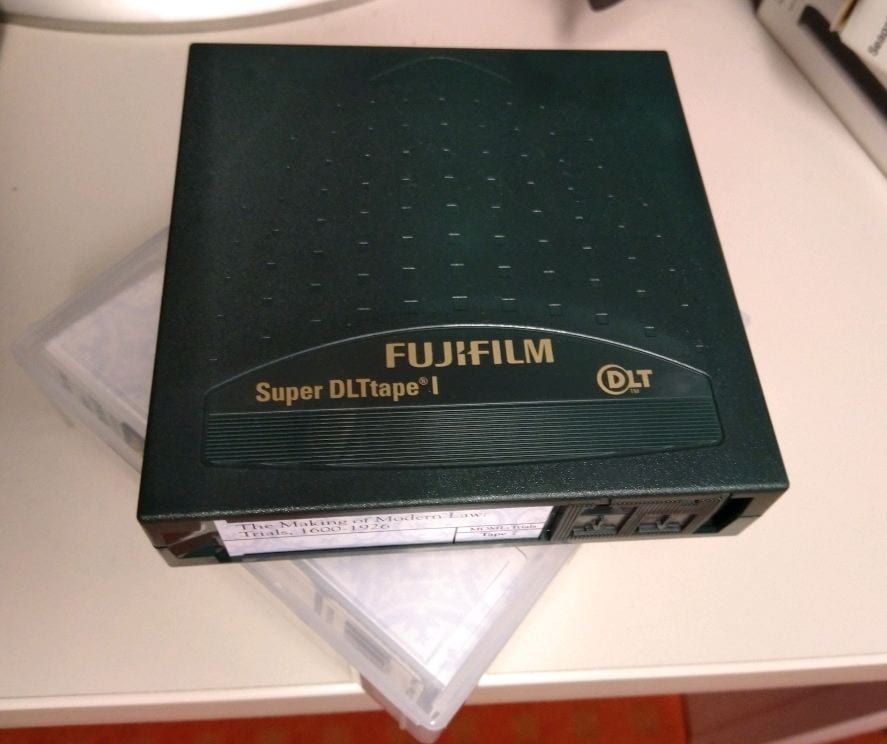
SDLT tape

SDLT Tape

One unique aspect of data tape formats is the diversity of physical formats that have come in and out of use over the past 50 – 70 years. This is especially evident in contrast to the relative stabilization of other physical formats (i.e., only two common sizes of floppy disk) that have enabled recovering disks written in many different formats with a small number of physical drives and a Kryoflux. While there are varying levels of complexity involved based on the format’s age, prevalence in the marketplace, and reliance on standards, each tape format requires having access to the full stack of hardware and software needed to access the data. Each format of tape that is received kicks off a series of steps to identify and acquire the technology needed to begin saving the data within.

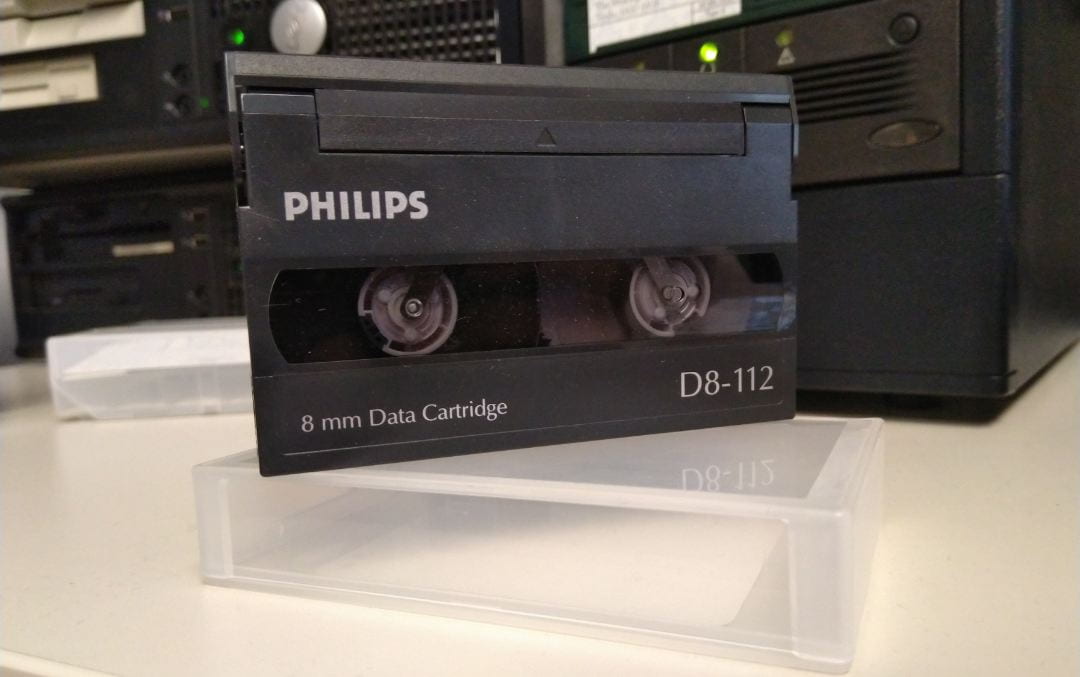
Data8 Tape

Data8 Tape

The high-level goal of the recovery process to move data into its long-term home in our Digital Preservation System. The process for working with tapes is detailed in the largely contiguous steps below.


Tape in hand:

The kickoff of any recovery is receiving a tape. This step begins the detective work of obtaining a working knowledge of both the tape format and the specific tape itself. Most useful at this step are any markings or labeling on the physical item or case, and/or other accompanying material. Typically there will be some marking of the make and model of the tape itself (like those found on a blank audio cassette tape).

Next is turning to the internet to find as much as possible about the format. The goal is to determine the era of the tape, find any manufacturer documentation, grab specification/standards documentation (if possible), and download software or drivers for related hardware. With some basic info gathered, next is determining what hardware will be needed to access and read the data.

Tape Drive:

Finding the proper drive for reading the tape in hand involves identifying compatible drives and coming up with a list of manufacturers and models. One consideration is the various generations that the tape format may have progressed through over its lifetime; this dictates drive compatibility.

In the case of a recent collection of tapes, the SDLT format is a part of a family of 10 different types of 1/2 inch data tape cartridges, beginning with the introduction of CompactTape in 1984 and ending with DLT VS1 in 2005. In the best case, information identifying which drive in the DLT family will read this specific generation of tape has been pulled out of the documentation and listed in one place (like Wikipedia in the case of SDLT), other cases require seeking out the documentation for various drives to confirm compatibility with the tape in-hand.

After determining the model of the ideal drive(s), the next step is to find one! In some cases, we have a compatible drive, already on-hand, in the di Bonaventura Family Digital Archaeology and Preservation Lab. Other times we turn to eBay to seek out and acquire what we need.

For tape, specifically for the DLT family, there were a couple of manufacturers of each generation of drive mechanism, and OEM resellers that would use that mechanism in their products. While not a huge issue, it can take some extra translation between the OEM labeling of the drive product and the model name of the tape drive.

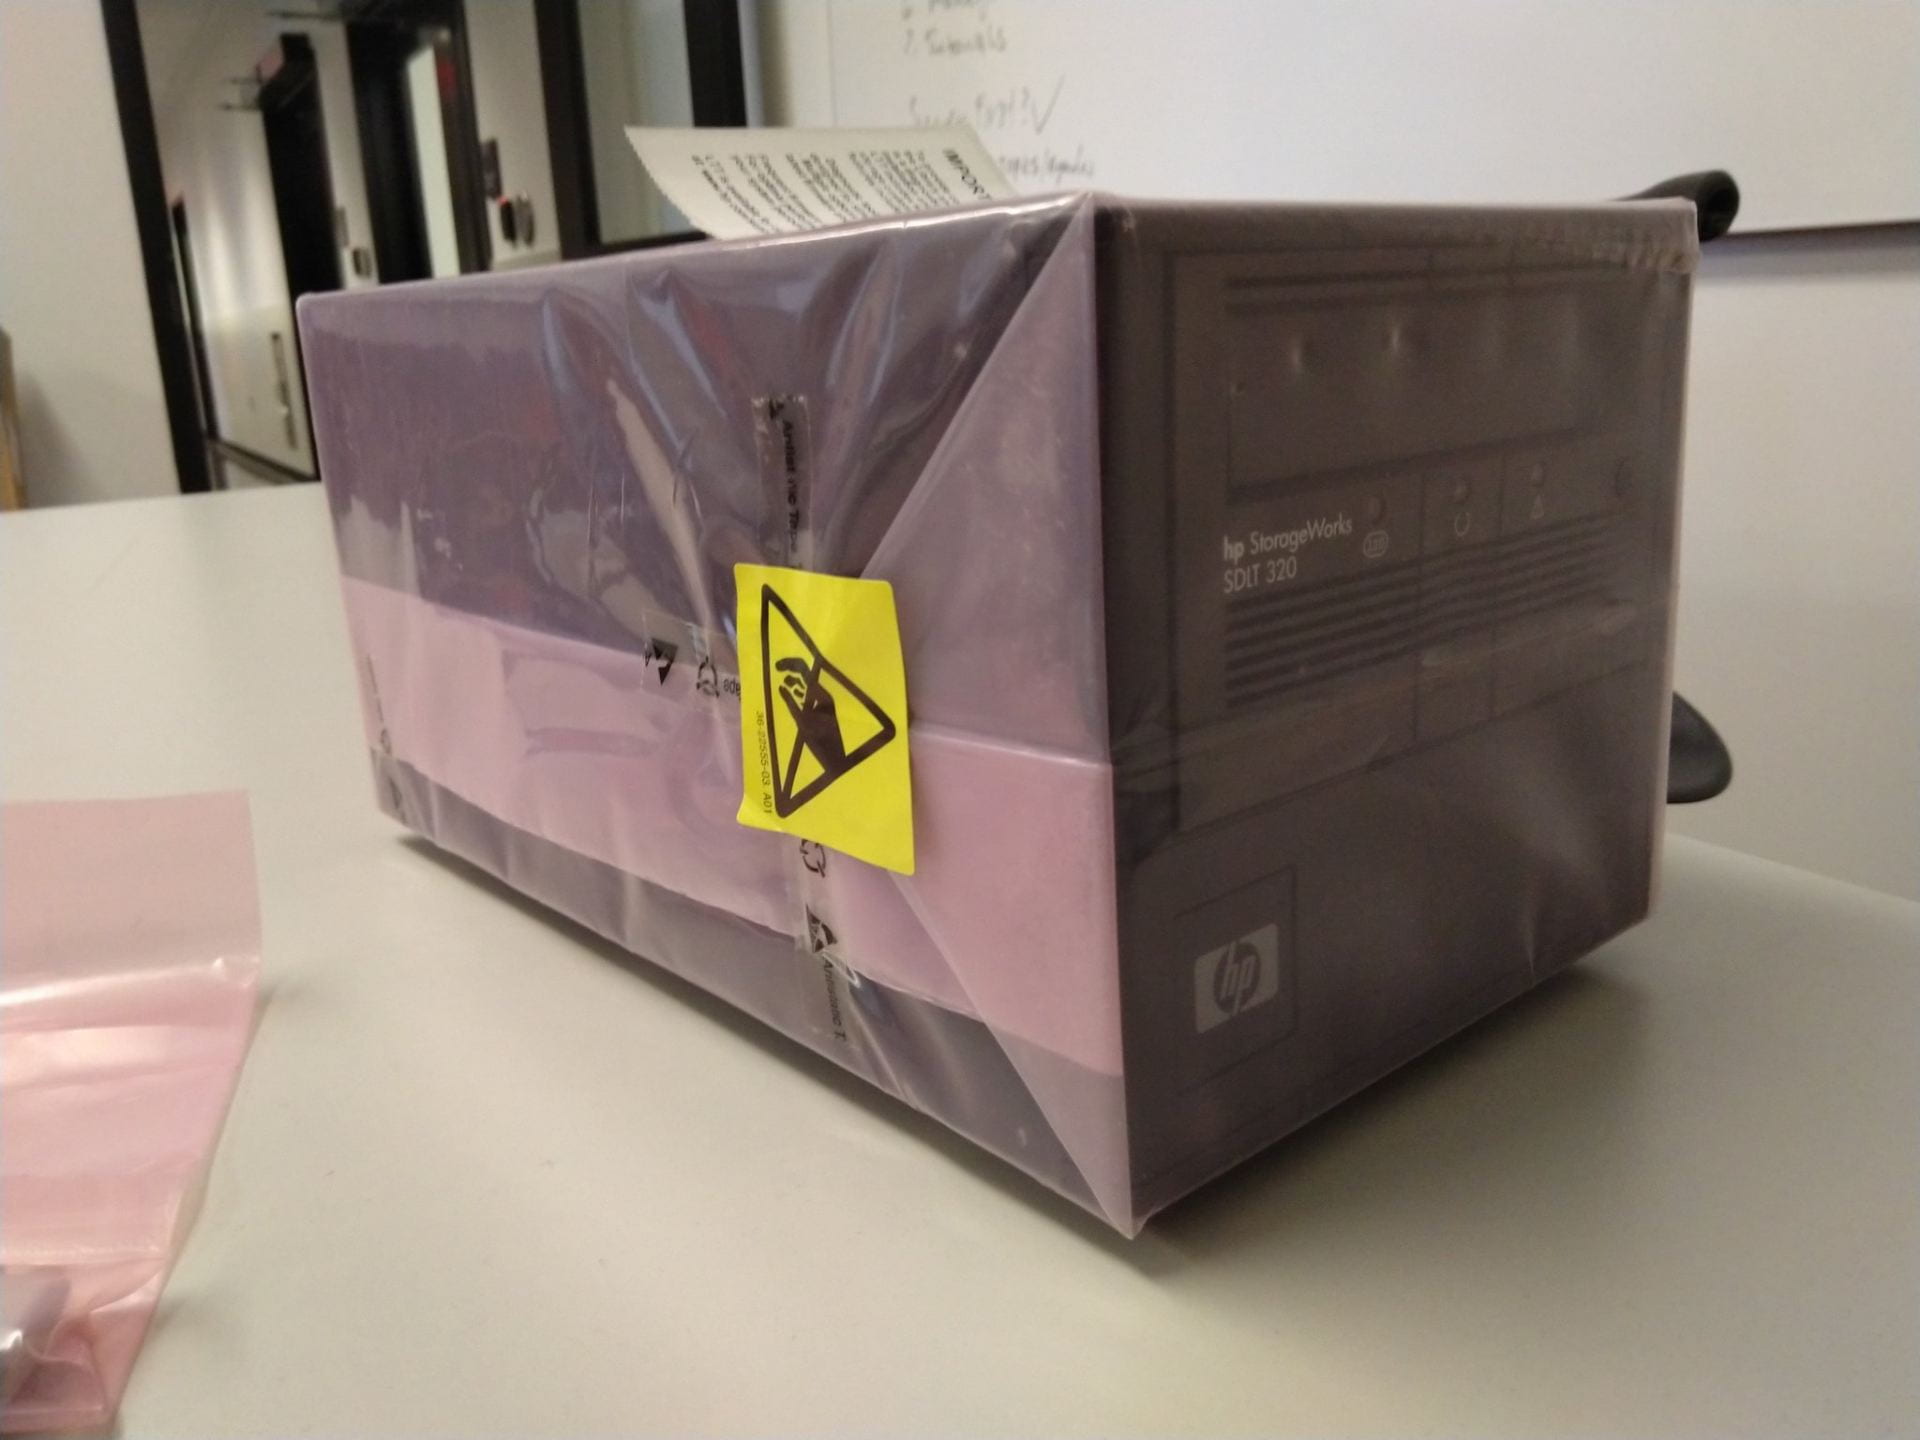
“New” SDLT Tape Drive

“New” SDLT Tape Drive

The ideal scenario is finding a drive in new old-stock condition, that is, still in its original packaging, completely untouched. This is particularly important for tape given the wear-and-tear caused by regular use that are amplified when degrading or dirty tapes are read. A blank tape and a cleaning tape are also important to grab for testing and maintenance purposes.

Host system – Operating environment:

Next we turn to actually using the drive. As with any peripheral, a host system is needed that is able to provide:

  • physical interface with the drive (often via additional card)
  • run drivers for the interface and tape drive
  • run software to control the drive
  • run software to read (and write) data to media in the drive

Some of these functions are found combined in a single application.

My first approach is generally to get access to or recreate a host system that is, in all aspects, as close to the system that would have been used originally with the drive and tape. The host system stack includes the hardware (workstation, interface cards) and software (operating system, drivers, applications). Ideally everything is available and ‘just works’ when combined. Most often each part requires some detective work to track down documentation, drivers, old software, and a fair amount of troubleshooting to solve the ‘old problems’ that occur when using legacy technology.

By the end of this step we are able to successfully read data off a tape, indicating that all parts of the stack are operating and interacting successfully. With this success we turn to finding any optimizations we can make to exploit modern technologies allowing us to increase the efficiency of working with legacy media and systems.

Optimization:

When working with legacy hardware and software, the greatest optimizations come from swapping out any part of the stack with modern technology. The modern equivalents of each component will most often provide improvements in reliability, speed, usability, and connectivity, each of which can make working with tapes more efficient and pleasant. The optimization process is similar to the three above steps, beginning with exploring alternatives for the hardware interfaces, workstation hardware, the operating system, and software applications for control of the device and data transfer. In the ideal case a legacy drive can be connected using a physical adapter to a modern interface, with modern hardware, running a current operating system, and operated with standards-based applications. The scripting possibilities and network connectivity enabled by these substitutions greatly increase the number of tapes we can process.

The Joy of Tape

Interspersed in all of these steps is testing and troubleshooting. Relying on legacy systems requires troubleshooting the full stack, turning back the clock on decades of technological and usability improvements. While the process can sometimes be arduous, the rush of joy that comes from hearing a tape spin up for the first time in decades, followed by seeing the bits of data that would be otherwise inaccessible, makes working with tape a wonderful experience.


Born Digital Archives Forum

by Jessica Quagliaroli

In the last blog entry Mary Caldera described the many people, committees, working groups, and departments across the Yale University Library System that contribute to the research and work on born digital archives. By my last count, there were at least eight different groups at Yale working on born digital archives. In an effort to highlight this work, the Born Digital Archives Working Group (BDAWG) recently hosted a Born Digital Archives Forum, which was structured around a combination of lightning talks, small group discussion, and Q&As. In addition to the main goal of highlighting work, we also wanted to provide a space for the various practitioners and groups to discuss challenges and share solutions.

The idea for this forum came as I was sitting in a Born Digital Description Taskforce meeting where members began discussing some areas of overlap with another committee. I had the thought that it would be helpful if, in this spiderweb of born digital archival work, we could all gather and update each other on our work and discuss any particular challenges we were facing. The other taskforce members agreed, and the idea was brought back to BDAWG for feedback.

I have to give many thanks to my colleagues on BDAWG for supporting my spur-of-the-moment idea and agreeing to host the forum. I especially have to give thanks to Alice Prael, who volunteered to be my co-planner. Over several weeks of planning, Alice and I secured lightning talk presenters and came up with discussion group topics and prompts.

Though the focus of the forum was on born digital archival work, we wanted to cast a wide net in attendees, and so sent out an invitation to the Yale Library listserv encouraging anyone engaging in born digital archival work to attend. We ended up with 18 attendees, many of whom directly work with born digital archives, but some who were interested in learning more about this area of research and work.

The Forum

We began the forum with our five lightning talk presenters. They were:

  • Born Digital Archives Working Group: Mary Caldera and Alice Prael
  • Base Image Project: Jonathan Manton
  • Born Digital Description Taskforce: Alison Clemens
  • Web Archiving Working Group: Rachel Chatalbash and Melissa Fournier
  • Emulation as a Service Infrastructure (EaaSI): Ethan Gates


Born Digital Archives Working Group: BDAWG Overview, BDAWG Collaboration and Consultation, Priorities for next year - advocacy and education, access, collaboration, network transfers

Slide from the BDAWG’s lighting talk

Each presenter had five minutes to highlight the work and current status of their group or project.

After the lightning talks, we broke out into small group discussions, focused on the following topics:

  • Access and Emulation
  • Privacy and Security
  • Appraisal and Selection
  • Description

Each small group was provided with three to four prompts as a way to generate conversation. However, the prompts were not always necessary. The photograph below shows that the Access and Emulation group merged with the Privacy and Security group to create one conglomerate:

Photograph of the conglomerate discussion group

At the end of the small group discussion a representative from each group reported out what had been discussed. We then ended with any Q&As and actionable items that came out from the small and large group discussion.
Photograph of wrap up discussion

Looking ahead

Overall, we were quite happy with how the forum ran and we received positive feedback from participants. However, there were a few “lessons learned” and areas for improvement for future forums:

  • Timing: Alice and I budgeted 30 minutes for the introductions and lightning talks, 30 minutes for small group discussions, and 30 minutes for the large group discussion. However, it was clear that 30 minutes was not enough time for both small and large group discussions. Going forward, we will likely plan for a two-hour event, providing for more discussion time.
  • Messaging: Early on I named the forum the “Born Digital Archives Working Group Forum,” which led to some confusion on both the purpose and scope of the event. Some thought the forum would only cover the work of BDAWG. The name was changed to the “Born Digital Archives Forum” and a line in the invitation was added to encourage all individuals engaging in born digital archives work, including interns, to attend. Clarifying the title and intended audience contributed to a higher attendance.
  • Sharing Outcomes: Each discussion group was provided with a whiteboard, markers, notepads, and pens. My intention was to capture the notes and any concrete action items on the whiteboards, which could then be photographed and shared out to the group. This was not communicated effectively, and most attendees took notes on their laptops, which meant that the outcomes of the forum could not be directly shared. Future forums should account for this, and some sort of digital note-taking platform, even a simple blank Google Doc in which attendees can dump notes, should be provided.

With these areas for improvements in mind, BDAWG looks forward to hosting more Forums in the future.


New Shared Born Digital Access Solution at Yale University Library

by Jonathan Manton and Gabby Redwine

Yale University Library (YUL) recently completed a project to create a shared solution for providing secure reading room access to restricted born-digital collections, primarily for YUL special collections units with no such existing solution, namely the Arts, Divinity, Medical Historical and Music Libraries. The objective was to devise a base hardware and software configuration for a machine in each unit that could effectively and securely provide reading room access to born-digital content and be supported and maintained by YUL’s Library IT unit. The project team successfully developed, tested and will soon deploy this solution. Project Co-Leads Gabby Redwine and Jonathan Manton discuss the method used to develop this solution as well as the end product.

Method

Following initial brainstorming exercises and demonstrations of existing born-digital access solutions currently in use at the Beinecke Rare Book and Manuscript Library (BRBL) and YUL’s Manuscripts and Archives (MSSA) unit, the project team formulated a set of principles and functional requirements for a shared base image. Library IT created an image prototype that incorporated these requirements. Each member of the project team then extensively tested this prototype using a collection of dummy materials intended to represent the variety of software and file formats, file sizes, and content types typically found in collections of born-digital materials. A final version of the base image was then created following feedback from this testing and further refinement.

End product

The final solution produced by this project incorporates a reusable base image that can be installed on a laptop with separate accounts for staff and patron access. Docking the laptop will allow staff to charge the battery and (via a physical connection to the Yale network) populate the machine collection content for a patron. The laptop can then be undocked, thus disconnecting it from the network, and simply handed to a patron in a reading room for use in a “locked down” environment.

This workstation:

  • Provides a clean, secure environment for accessing born-digital collections in a reading room.  
  • Provides a common Windows environment, navigable by most users.
  • Prevents patrons from copying or otherwise transferring content to removable media or remote network locations, or accessing their personal email account.
  • Allows patrons to create local working copies of collections content on the desktop during their session, that they can annotate.
  • Provides common software packages for accessing the most prevalent file formats currently found within YUL’s collections, with QuickView Plus provided for any files not supported by these common applications.
  • Imposes a non-networked environment when patrons are using the machine undocked. However, a network connection is available once the laptop is returned to a docking station with an ethernet connection, allowing designated staff to access the machine, either locally or remotely.
  • Allows patrons to search across a corpus of collection materials efficiently.

Project Team: Christopher Anderson (Divinity Library); Molly Dotson/Mar González Palacios (Arts Library); Melissa Grafe/Katherine Isham (Medical Historical Library); Jonathan Manton (Music Library, project co-lead); Gabby Redwine (BRBL, project co-lead); Beatrice Richardson (Library IT); Cvetan Terziyski (Library IT). Consultants: Julie Dowe (BRBL); Jerzy Grabowski (MSSA).

The Saga of Thor 2 and the Pink Wool Sweater

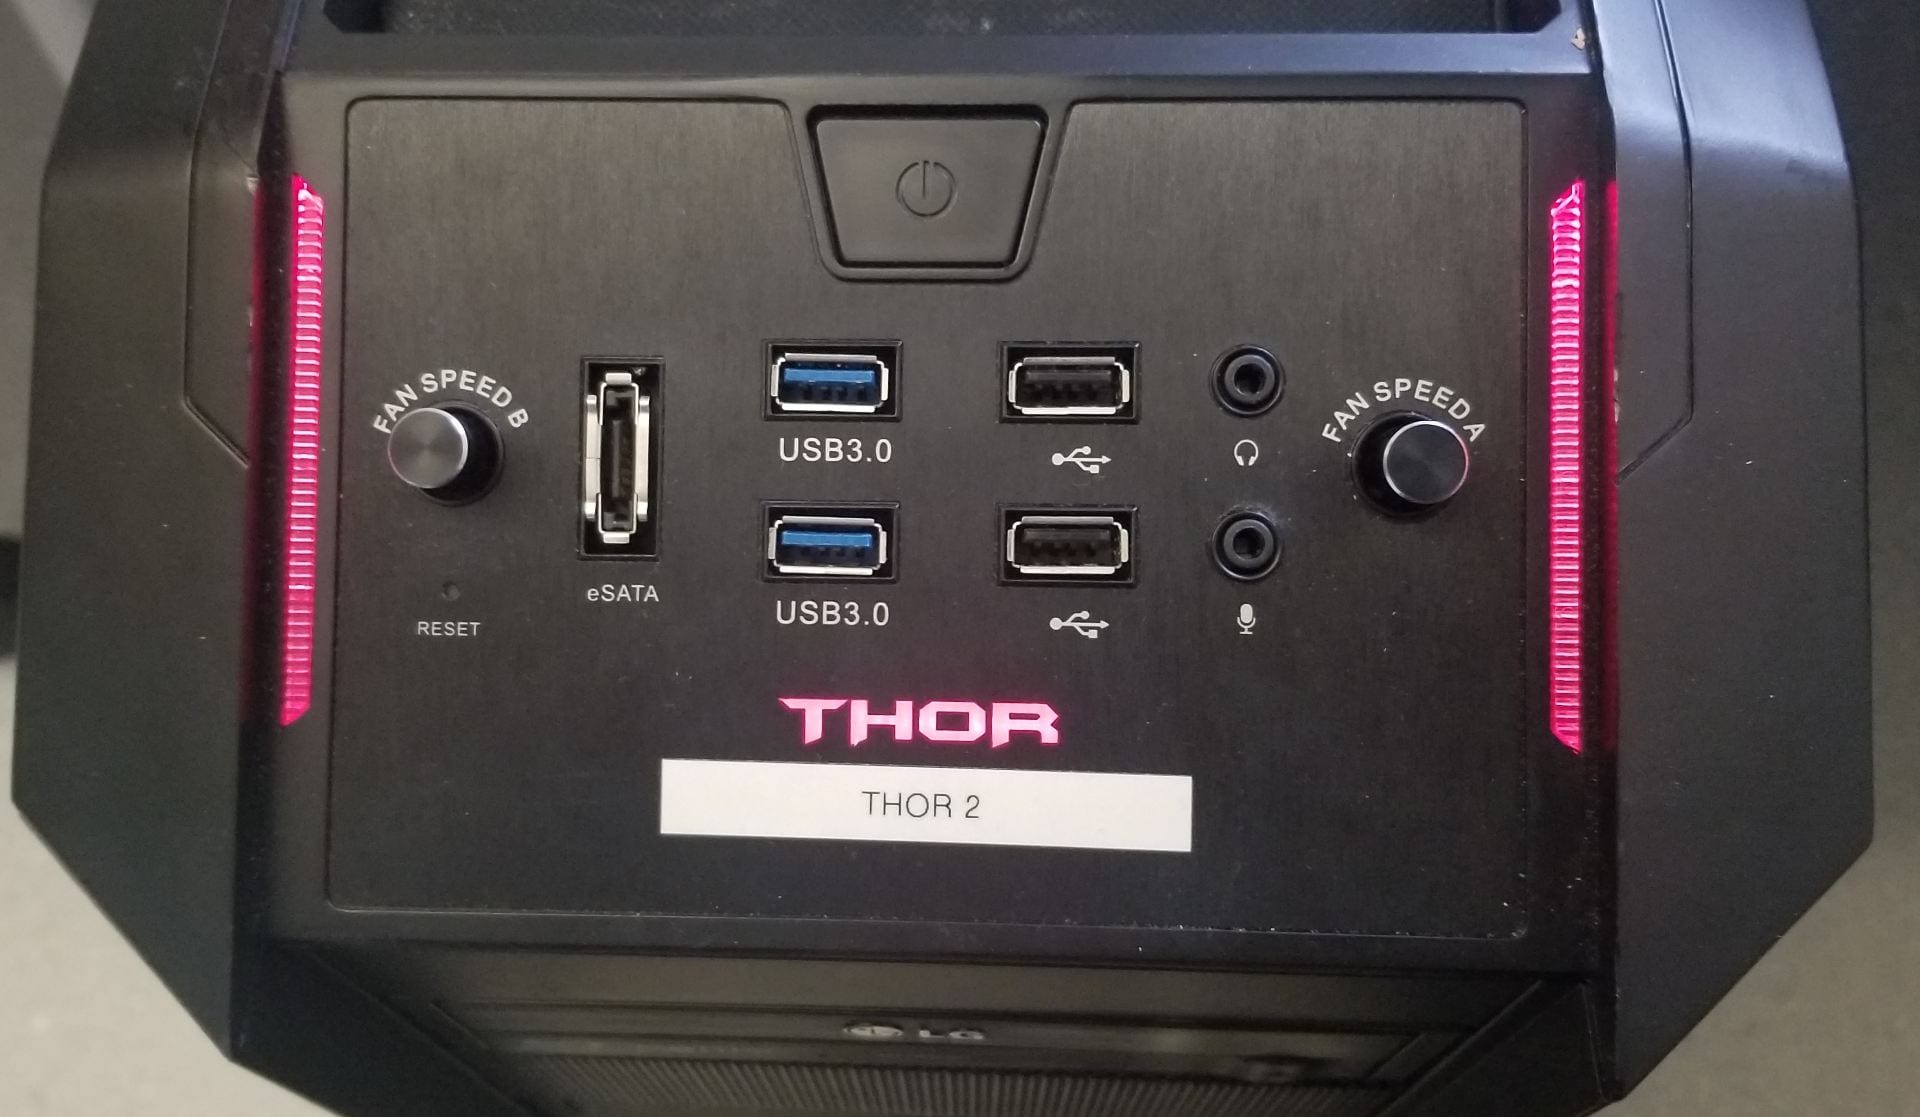
In early February of 2017 one of the Kryofluxes in the Di Bonaventura Digital Archaeology and Preservation Lab malfunctioned. The Kryoflux is a controller board that allows modern computers to interface with floppy drives. The lab houses two custom-built disk imaging machines, both of which have internally installed Kryoflux boards. They were both built with a large case so there’s plenty of room for additional drives as needed. The case model is a Rosewill Thor and prominently displays “THOR” in glowing red letters when the machine is turned on. To help differentiate between the two they were named Thor 1 and Thor 2. On this day, the Kryoflux inside Thor 2 malfunctioned and started a month-long saga of replacement parts, power cords, and one falsely accused wool sweater.

Front of computer tower, USB ports, power button, and glowing "THOR"

The Kryoflux in Thor 2 is connected to both a 5.25- and 3.5-inch floppy drive, but it would only start communication with the 5.25-inch floppy drive. After exhausting my options for troubleshooting the software, I opened up Thor 2 to attempt the old IT standby –unplug it and plug it back in. This entailed turning off the machine, opening the case, unplugging and replugging in the kryoflux board. Once everything was plugged back in, I turned on the computer. I hadn’t closed the case yet, so I could see the computer fan start to spin then immediately stop. Nothing turned on. It was like a car’s engine turning over but failing to actually start. I tried again and again the fan started to spin, a light on the Kryoflux board lit up, then everything died again.

On this fateful day, I wore a cotton-candy pink wool sweater to protect from the cold New England library temperatures. As I sat there confused by the Thor 2’s refusal to turn on I came to a terrifying conclusion. The static electricity from my sweater had fried the motherboard. It’s not a common occurrence, but I had heard of other people frying their motherboard with a static charge.  My online research led me to believe that a catastrophic failure like this had to be an issue with either the power supply or the motherboard.

In disbelief that my innocent pink sweater could be responsible for this, I tried unplugging and plugging back in the computer and the Kryoflux to no avail. For the next few weeks I tested and replaced several major components.  I decided to start with replacing the power supply, but I found the same result. A slight spin of a fan before everything died again. So, I ordered a new motherboard, finally acknowledging that my sweater had brought down the mighty Thor 2. Four hours of installation later Thor 2 had a shiny new motherboard and the exact same failure to turn on. The last recommendation from both online forums and our IT staff was to replace the microprocessor. Having just reinstalled the motherboard, I was familiar with the microprocessor placement process. With the new microprocessor installed, I eagerly turned back on Thor 2, ready to get back to disk imaging and out from underneath my desk. The fan made one rotation before turning back off. With that, I threw my hands up in the air, unsure of what to even try at this point.

I had replaced all the major components with no success, so I started replacing smaller components. I started by unplugging all the cords connected to the Kryoflux. The Kryoflux malfunction started all this, so it made sense to start there. With the Kryoflux disconnected I turned back on the machine and fan started turning, and it kept turning! Then the monitor started to glow! Obviously, I couldn’t capture content from floppy disks with a disconnected Kryoflux board, but I was thrilled to see Thor 2 glowing again. Then, through process of elimination, I determined that the power cord to the 3.5-inch floppy drive was the real culprit. My sweater was exonerated! This small cord providing power to a floppy drive had been shorting out the entire machine. Once the cord was replaced, Thor 2 returned to full function and has been happily disk imaging floppy disks ever since.

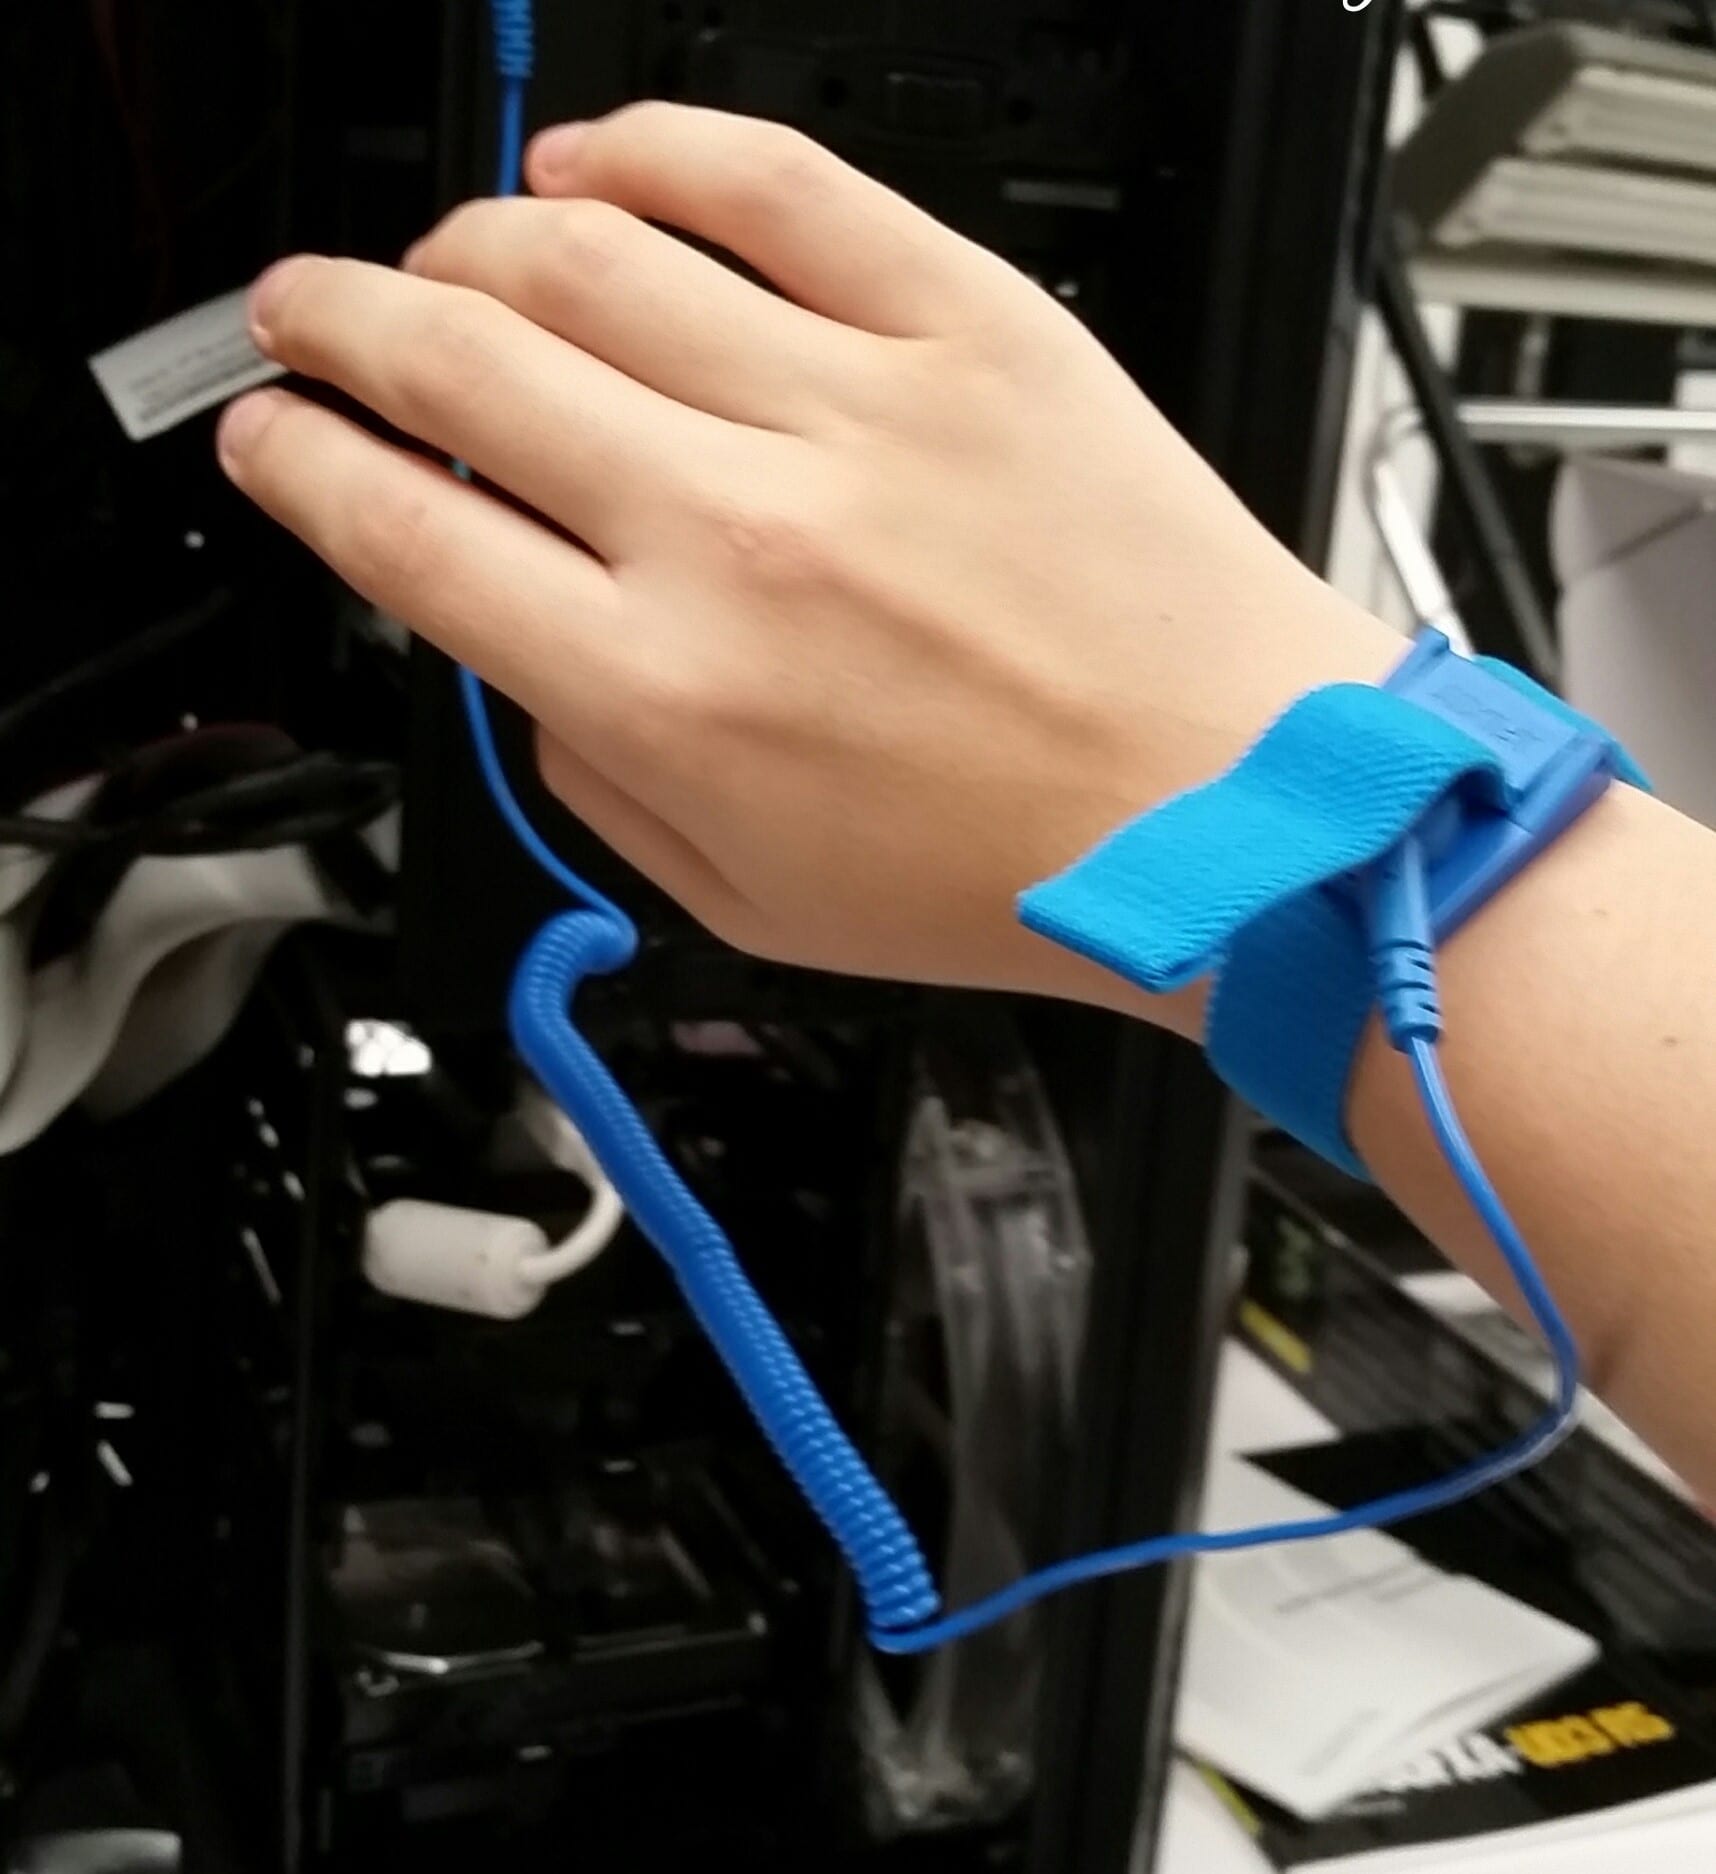
Although this was a frustrating experience, it did give me an intimate understanding of the internal workings of our disk imaging machines. If a similar situation arose today, I would spend more time attempting to isolate the problem. Since the problem was system wide, I mistakenly assumed the cause had to be at a higher level than a single cord to a floppy drive. And the final lesson learned, it’s worth it to wear the anti-static bracelet when repairing a computer—if only to assuage any fears about wearing a sweater at work.

Hand wearing anti-static wristband in front of open computer tower

Invisible Objects: Preserving Born-digital Art Collection Records at the Yale Center for British Art

By Cate Peebles, Museum Archivist, Yale Center for British Art

When you walk into an art museum gallery, the first thing you see is likely an assortment of visual works in any number of tangible forms: paintings, prints, sculpture, installations of mixed media, or film. If you look closer, often there is a piece of wall text containing contextual and historical information and descriptions of the materials used to make the work: oil on canvas; glass, latex, and paper; silk, horsehair, and gold. This information is also often accompanied by a brief note of provenance, such as “From the Paul Mellon Collection.” Wall text is created by curators to enrich the viewer’s understanding of how, when, where, and why an object was made, hopefully instigating further exploration of the artwork. What you will not see, though, are the countless number of documents and records that comprise each artwork’s history.

For centuries, the paper trails of artworks have been preserved and stewarded by collectors, galleries, libraries, and museums. Today, daily transactions and interactions transpire digitally, on computers and smartphones, in formats that are far less stable than paper. The histories of museum objects are no exception.

Over the last year, I have worked with curators, conservators and registrars at the Yale Center for British Art, as part of the inaugural NDSR Art cohort, to develop a system that will help preserve born-digital art documentation created and stewarded by staff to ensure the preservation of our collections’ history.

Logo for National Digital Stewardship Art

The National Digital Stewardship Residency (NDSR) for Art info program is an iteration of the NDSR program that began in 2013, with a pilot project developed by the Library of Congress in conjunction with the Institute of Museum and Library Services (IMLS). Each grant-funded NDSR iteration places recent master’s degree recipients, mostly MLIS but not exclusively, with host institutions, providing residents with mentors and professional development opportunities, as well as a project that has been developed by the host institution and mentor– NDSR Art’s first cohort was hosted by: University of Pennsylvania, Philadelphia Museum of Art, Minneapolis Institute of Art and the YCBA. NDSR Art is managed by the Philadelphia Museum of Art in partnership with the Art Libraries Society of North America.

One of three museums on the Yale campus, the Yale Center for British Art houses the largest collection of British art outside the United Kingdom. It was founded in 1966 with an endowment from philanthropist and art collector, Paul Mellon, the museum building was designed by renowned 20th Century architect Louis Kahn and opened to the public in 1977. Its collections contain thousands of artworks, including paintings, sculpture, prints, drawings, rare books, manuscripts, photographs, and a research library and institutional archives.

Photograph of YCBA Exterior

YCBA Exterior, photography by Richard Caspole

The YCBA’s Institutional Archives is a relatively new department at the museum. It was established in 2009 and has been more fully developed by Senior Archivist Rachel Chatalbash in the last six years with a mission to identify, collect, organize, and preserve the records produced by the Yale Center for British Art, as well as materials related to its history; to make this historical documentation accessible for administrative support and research; and to support a deeper understanding of the Yale Center for British Art’s historical legacy.

Digital Preservation & Museum Records Stewarded Outside the Archives

My project was envisioned to complement and extend the Institutional Archives’ existing born-digital preservation and records management program by addressing born-digital, historically significant, art collection records permanently held outside the archives. So, while the YCBA’s Institutional Archives collects significant records relating to the museum’s collections and activities, this project has sought to develop a way to preserve other essential, historically significant records that are maintained and used by museum departments that relate to the Center’s permanent collection objects.

Object-related records comprise the provenance of the YCBA’s collection objects, and are managed by staff in analog and digital form, which also includes the collection management database, The Museum System, or ‘TMS’, a proprietary software that is used by many museums in the United States to catalog collection objects.

Record-types included in this project:

  • Object files – correspondence, acquisition information, ownership documentation, historical information about the object.
  • Collection research
  • Loan records
  • Conservation documentation

In digital form, these records include various formats, but especially:

  • PDF
  • Word documents
  • TIFF
  • Excel spreadsheets
  • TMS database tables

Through the stages of this project, I sought to develop a system that both preserves these born-digital records and allows for continued management and access by staff, as they’re accustomed to having with analog files; interdepartmental collaboration and cooperation was an essential component of developing new workflows and organizational structures and ultimately preserving born-digital permanent collection documentation in Preservica.

Working with Museum Departments

After completing a series of introductory meetings with museum staff in the fall of 2017, I established relationships with the museum’s collection departments, including:

  • Conservation
  • Curatorial: Prints and Drawings, Paintings and Sculpture, Rare Books and Manuscripts
  • Registration

I created a variation of archival appraisal reports for each department, following guidance from Appraisal and Acquisition Strategies, published by the Society of American Archivists, and edited by Michael J. Shallcross and Christopher J. Prom. These reports documented departments’ existing practices regarding their object-related digital records and provided me with an understanding of where to begin creating new workflows.

Ultimately, it became clear that shared access between departments and the Institutional Archives and file organization would be essential to complete the task of supporting digital preservation efforts.

For example, with shared access, conservation treatment reports can be directly ingested from the department’s shared network drive into Preservica, where file organization is mirrored. Depending on the number of files to ingest, either the Preservica’s SIP creator GUI or command line interface is used for the process.  

Screenshot of spreadsheet and command line interface used for ingest

Screengrab of ingest spreadsheet and CLI

Curatorial departments are creating digital folders for object files for the first time. These digital ‘object files’ mirror the structure and contents of their analog counterparts.

Conservation records, shared server and Preservica

Conservation records, shared server and Preservica

As of this post’s publication, roughly 4 TB of legacy documentation from the Conservation and Registration departments has been ingested. New additions from each department will be ingested annually.

TMS – The Museum System & Emulation as Preservation Strategy

My project also addresses the records in the collection management system, The Museum System (TMS). TMS is actively used and updated, and is a living record of the museum’s collections. TMS contains thousands of inter-related tables, which comprise the system’s modules, that contain object metadata, as well as linked documents that are attached to the system as media files.  Its contents are an essential aspect of the YCBA’s object histories, as written catalogs and ledgers once were; preserving snapshots of the database also preserves a history of cataloging practices.

A prominent aspect of the project was to investigate preservation strategies that would capture and preserve everything contained in TMS, which led me into discussions with the Center’s neighbors in Digital Preservation Services where a project is in development to preserve software with emulation. The project, Emulation as a Service, called EaaS for short, is managed by Seth Anderson and seeks to provide networked, remote access to useable software environments.

The challenges of digital preservation don’t belong to any one department or discipline, therefore it’s essential to work interdepartmentally. We are in a transitional phase that requires communication and collaboration, and this work applies to museums of all kinds and all manner of collections, not just art. Museum archivists and digital preservation librarians have an important role to play in bringing attention to valuable digital records that document museum collections’ object histories.

This project is but one example of how museum archivists can start the conversation with colleagues, share expertise, and implement new organization and workflows that will help preserve born-digital collection records. It’s essential for museums to get the conversation started and to identify which records are at risk. Archivists are especially poised to advocate for and promote practices employed for our own collections for significant born-digital records managed by other departments. It takes advocacy to make these resources visible, and to keep them visible.