Hi! This is Alicia Detelich, archivist at Manuscripts and Archives, and Christy Tomecek, project archivist at the Fortunoff Video Archive for Holocaust Testimonies. We are co-leaders of the ArchivesSpace Public User Interface (PUI) implementation project’s Data Cleanup and Enhancements Workgroup. Today we’re going to share a little bit about the initial planning efforts that our group has relied upon to guide us through this project.
Our five-member group has a variety of tasks to accomplish before the PUI “goes live” early next year, including:
- Reviewing data across Yale’s 14 ArchivesSpace repositories
- Determining the extent of cleanup and normalization required, and the approach(es) to making changes
- Working with repository liaisons to ready data for ArchivesSpace publication
- Creating, testing, and executing cleanup and normalization scripts
- Performing quality control on updated data
Data cleanup and normalization is a full time job for some archivists, and we all have other responsibilities. Because of our time constraints and the enormous quantities of metadata produced by Yale’s special collections repositories, we had to start by doing some hard thinking about which data issues would have the greatest impact on the security of our records and on the experience of our users, and to limit our work to just those areas. Keeping our expectations realistic and avoiding overcommitting has been an important part of this process, and has almost certainly kept us from going insane (for the most part)
During an early brainstorming session in which we identified a laundry list of potential data issues to address, we debated which of these issues would be “show-stoppers,” which ones should be prioritized in order to enhance access, and which we could afford to deal with at a later date. By the end of the meeting, we had settled on the following areas of focus:
Publication status
In our current system, YFAD, finding aids are published once a week after the documents are proofread for content and for correct EAD encoding. This process also includes using an XSLT transformation which, among other things, has certain stopgaps in place for suppressing data that may have been accidentally published or is restricted from researchers while still necessary for staff. In the ArchivesSpace PUI, our finding aids will now be published instantly and will not have these XSLT suppressions. This will require us to review our current finding aid data to ensure that nothing that is confidential is accidentally made available, such as student or patient names. Repositories may also wish to unpublish records for collections that are still in process and that they cannot make available to researchers. To that end, we will work with representatives of each repository to identify any necessary changes to the current publication status of all resources, archival objects, accessions, and notes, and make these changes prior to the official launch date.
Date normalization
The ArchivesSpace PUI is more dynamic than our current system, and provides many more opportunities for filtering and faceting data. Because of this, it is much more important for us to have structured data that can be read and manipulated by machines. For instance, the PUI allows users to search for materials created during a given date range. This functionality requires that dates entered into ArchivesSpace be machine-readable. During previous migrations, date information was often added to the expression field, but not parsed into ArchivesSpace’s machine-readable beginning and end dates. Additionally, practices for formulating dates have varied widely among repositories – there are almost too many variations to count. While we may not be able to fix every single date issue, the more we can accomplish before launch, the more effective the PUI will be for our users.

Machine-actionable restrictions
Our conditions governing use and conditions governing access data are also top candidates for normalization. Since 2015, it has been possible for repositories to add structured restriction information, such as end dates or condition notes, to our resource and archival object records. Aeon is able to act upon these restrictions, letting users and staff know if an item is restricted, and allowing for appeal by researchers and review by repositories.
A great deal of work has already been done to add machine-actionable dates and local access restriction types to the records of some repositories, but there are still a number of resources and archival objects which could benefit. The impending integration of Aeon with ArchivesSpace, and the potential impact of this functionality on staff and on users indicated to us that it should be one of our top priorities for clean-up and enhancement.
Note Labels
Yale’s special collections repositories have traditionally operated independently of one another, and so over time developed different policies and systems for doing descriptive work. This has resulted in a wide array of standards, jargon, and even grammar choices in our finding aids. One example is the all kinds of variability in the way that descriptive notes are labeled. While this may not seem all that consequential, labels can affect a user’s experience quite drastically. It might not be clear that a “Summary” or “Description of the Papers” is the same as a “Scope and Content” note. It is important that the same type of note be called the same thing, no matter which repository a user is searching.
In our current YFAD setup, the display of labels is suppressed by the above-mentioned XSLT, but this will no longer be the case once the PUI is implemented. This necessitates a thorough evaluation of our note label usage, and an eventual policy decision about how notes should be labeled – across all repositories – going forward.
URLs
Our repositories have long been adding URLs to note fields or digital object records. Unfortunately, we’ve been doing this so long that some of these links are likely broken. Directing users to a 404 page is never ideal, so we took this project as an opportunity to review our links to determine how many are broken. Though we aren’t necessarily testing the accuracy of the links – whether they direct the user to the intended web page – we just want to know (for now) if the links actually work.
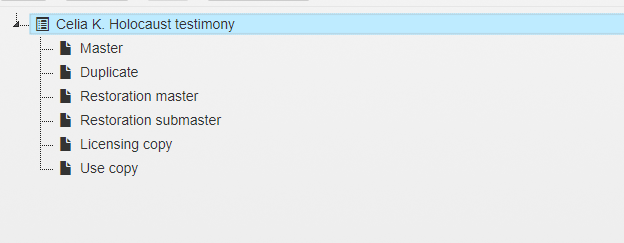
Containers
With the exception of Manuscripts and Archives, most repositories at Yale are still using two systems to manage their descriptive and collection control metadata. YFAD and Aeon pull in descriptive information from ArchivesSpace, and container and location data comes from our ILS, Voyager.
Integration with Aeon is a major part of the PUI implementation project, and having complete and accurate container data in ArchivesSpace is a necessary part of the integration work. In order to ensure the accuracy of our top container data, we will need to compare what is in ArchivesSpace with what is in Voyager. Any discrepancies, particularly where there is data in Voyager but not in ArchivesSpace, will need to be resolved in conjunction with the repositories which created the data.
Shared records and controlled value lists
One interesting side effect of importing EAD into ArchivesSpace is that any controlled values that are present in the EAD file can be added to the enumeration values list in ArchivesSpace. This has left us with some very messy controlled value data. For instance:

Normalizing these shared lists – most importantly those related to container and extent types – will present users with a more unified experience, and facilitate robust searching and faceting in the PUI. Removing duplicative or erroneous values will also help prevent messy data issues from recurring in the future.
The (nearly completed!) project to clean up our name and subject records that Alison mentioned in her last post also dovetails nicely with this work. The addition of Library of Congress URIs, and the eventual removal of duplicate records will greatly enhance the functionality of the PUI, and will remove duplicative or incorrect values that may confuse users.
All this in six months? No problem!

Since deciding on the scope of the work, we’ve undertaken the fun and slightly intense task of auditing our data in each of these areas. We’ll be back in another post to talk a bit about our data auditing process and reveal some of our most interesting results. For now though, we’re excited to do our part to help make the ArchivesSpace PUI more useful for staff and researchers.